Worm farming for profit is something that anyone with a backyard or garden can try. It's a fun and rewarding activity that can help you earn extra cash in your spare time.
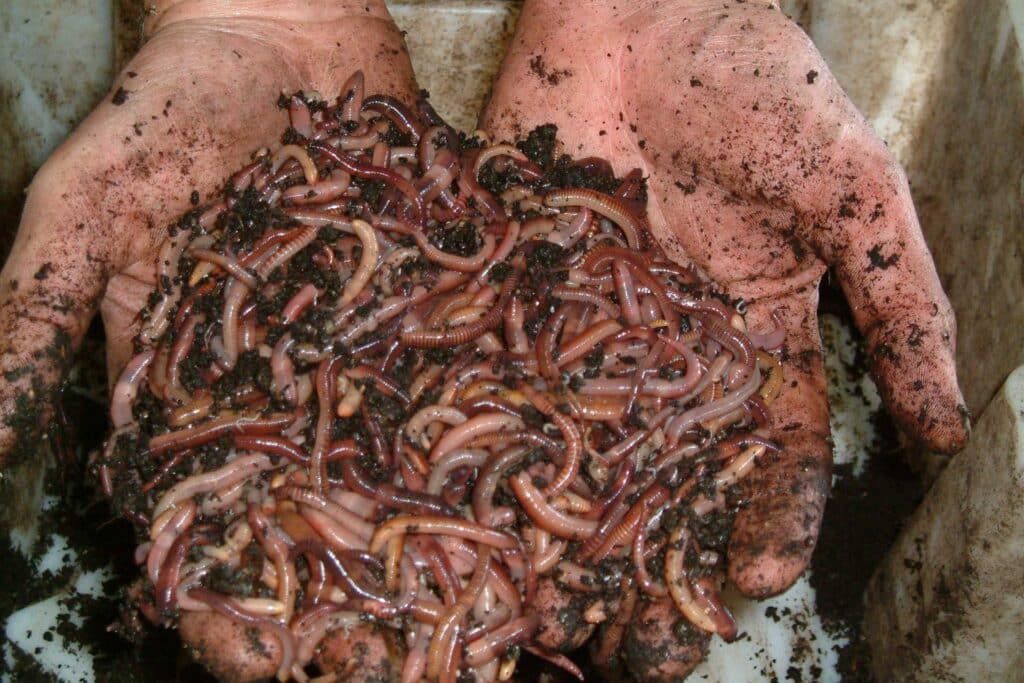
Worm farming in your own backyard is a fantastic way to not only earn some extra cash, but to regenerate your soil with the best nutrients too, as worms are incredibly efficient at breaking down organic material and producing nutrient-rich fertilizer.
Not to mention, it's a great way to get your hands a bit dirty and learn more about the natural world. As always, where possible, I asked the good people on Twitter for their best advice and got plenty of it in return.
I made sure to include the best bits from the thread in this article where we’ll look at the basics of worm farming and how you can set up a worm farm in your backyard to make some extra money.
We’ll discuss the benefits of worm farming, worm farming for profit, what you need to get started, and some tips to ensure your success.
So, if you’ve been looking for a fun and easy way to make extra cash from your self sufficient life, worm farming might just be the perfect solution.

Worm Farming For Profit: Getting Started
Worm farming is an amazing way to make some extra money for yourself from your land whilst supplying you with a fantastic supply of nutrient-rich compost that can be used in your garden and loads of worms that you can sell. It's pretty much a win-win-win.
It is a productive way of recycling your food waste too, by composting it in an efficient way. Worms can eat up to half their body weight in food waste each day.
The worm castings (worm droppings) are full of micro organisms, plant growth regulators and enzymes that will boost any garden they're fed to and are also a valuable commodity that can be sold.
On top of that, they also produce ‘worm juice'; worm wee, in other words, which is a super-powerful concentrate to make your own fertiliser solution with which again, can be sold.
Getting started with worm farming can be relatively easy and with a few simple steps, you can be on your way to creating a productive, sustainable environment for your worms and a profitable venture for yourself.

Choosing the Right Location
The first step to getting started with worm farming is to choose the right location. Worms need to be kept in a warm (but not hot), dark, and moist environment, so it’s important to choose a location that is not too hot, cold, or exposed to direct sunlight.
This is why regularly well maintained covered compost bins are a haven for worms.
It’s also important to make sure that the location is accessible and easy to maintain. A kitchen or basement is generally a great spot to start, as these areas are typically dark, warm, and accessible.
Acquiring and Setting Up Your Worm Bin
Once you’ve chosen the right location for your worm bin, it’s time to acquire and set up your bin. There are many different types of worm bins available, ranging from homemade bins to commercial units.
When selecting your bin, it’s important to consider the size and the material that it’s made from. Generally, plastic bins are the best choice, as they are easy to maintain and clean.
Build Your Own Worm Bin
To build your own wormery, you could follow the plan of the first wormery Bucket of Worms made (the one pictured below) which was simply constructed with untreated plywood, 2 feet high, 2 feet deep and 4 feet wide, with a lid and a perforated floor to allow for drainage.
You should have a tray or bucket to capture the drained liquid as this is your liquid gold worm juice.
In order to prevent small rodents from gnawing their way into the wormery it is a good idea to attach some light wire mesh to the underside of the floor of the wormery.
The wormery should ideally be placed on 2 pieces of wood (batons ideal) 25-50mm high to allow moisture to drain out. Drill plenty (approx. 20) of holes in the floor, approx. 12mm in diameter. The sides and bottom were made with 12mm plywood, while the lid and partitions were made with 8mm plywood in order to reduce weight.
When Bucket of Worms made their wormery, they divided it into three sections, each partition had plenty of holes of about 8mm diameter drilled into them, allowing lateral movement of your worms.
The advantage of partitioning your wormery is that when a section is getting full you can stop feeding it for 3-4 weeks. As the wormery worms run out of food they will migrate into the other sections. This allows you to remove the finished compost from the rested section without taking all the composting worms with it.
Another great resource for building your own wormery is the great video guides at The Urban Worm website.
Once you’ve chosen (or built) your bin, it’s time to set it up. This includes adding bedding, such as shredded newspaper or coconut coir, as well as adding some food scraps or compostable material to the bin.

Stocking and Feeding Your Worms
Once your bin is set up and ready to go, it’s time to stock and feed your worms. The best type of worms to use for composting are red wigglers but Dendrobaena worms are also a good choice. These worms can be purchased online or in some garden stores.
When stocking your bin, it’s important to add the worms slowly and in small batches. This will help them adjust to their new environment and will also help to avoid shocking them with a large influx of food.
Once the worms are in the bin, it’s important to feed them regularly. The best type of food for worms is fruit and vegetable scraps, as well as some coffee grounds and tea bags. It’s important to feed your worms in small amounts, as they are slow eaters and can easily become overwhelmed with too much food.
With the right location, bin, and feeding regimen, you can be on your way to creating a successful worm farm in no time.
Maintaining and Harvesting Your Worm Farm
Maintaining and harvesting your worm farm can be a rewarding experience, as you will be able to enjoy the fruits of your labour in the form of nutrient-rich, organic compost.
To maintain and harvest your worm farm, there are a few simple steps that you should follow:
First, you should make sure that your worm bin is properly ventilated. This will help to prevent the build-up of excess moisture and will also reduce the chances of your worms becoming too hot or cold. Additionally, you should monitor the bin's moisture level and ensure that the worms have enough food and waste material to keep them healthy.
Secondly, you should periodically check your worm bin for signs of disease or pests. If you find any problems, take steps to address them immediately. This could be as simple as adding a few more worms or adjusting the temperature and moisture levels in the bin.
1. Feeding and Caring for Your Worms
The key to maintaining a successful worm farm is providing your worms with the right food and care. Worms are slow eaters and need to be fed small amounts of food on a regular basis.
The best type of food for worms is fruit and vegetable scraps, as well as some coffee grounds and tea bags. It’s also important to provide your worms with a moist environment to encourage them to stay healthy.
To do this, you can add some damp shredded newspaper or coconut coir to the bin.
2. Harvesting the Worm Castings
Once your worms have been properly fed and cared for, it’s time to harvest the worm castings. Worm castings are a nutrient-rich compost that can be used in your garden.
To harvest the castings, you’ll need to carefully move the bedding aside and remove the worms from the bin. The 3 compartment Bucket of Worms setup shown above makes this process far more simple than if you had to go through the compost by hand.
Once the worms have been removed, you can carefully collect the castings and add them to your garden.
By following these steps, you can ensure that your worm farm is well maintained and that you can reap the benefits of your hard work in the form of nutrient-rich, organic compost.
Maintaining and harvesting your worm farm is a simple but rewarding process that can provide you with a great source of organic fertilizer for your garden.

3. Harvesting The Worm Juice
If you've set up proper drainage where all the drained liquid filters down into a bucket or jar, then harvesting the worm juice is as simple as removing and replacing the container and then bottling it up for use as a concentrate at a later date.
I've seen examples of people using bathtubs as the basis for their worm farm because they have a natural drain which makes it easy to manage the capturing of worm juice.
Making Money with Your Worm Farm
Worm farming is a great way to make money from the comfort of your own home. By providing a safe environment for worms to thrive, you can create a sustainable business that requires minimal effort and time.
With a little bit of knowledge and the right resources, you can have a profitable worm farm up and running in no time.
Worm farming for profit is a great way to make money because the demand for worms is continuously increasing. Worms are a great source of natural fertilizer for organic gardening, and they’re also becoming increasingly popular as fishing bait.
Worms also make great pet food, especially for reptiles and other exotic animals. As the demand for worms continues to grow, worm farmers can easily make a profit.
Market & Promote Your Worm Farm
Once your worm farm is up and running, you’ll need to market and promote your business. You can start by setting up a website or social media pages to showcase your work.
Word of mouth is also a great way to get your business off the ground. You can also sell your worms to local farmers, gardeners, and pet owners.
In addition to the worms, there are several by-products that make the investment worth it:
1. Selling Worm Castings
One way to make money with your worm farm is to sell the worm castings. Worm castings are a nutrient-rich compost that can be used in your garden.
Worm castings are highly sought after and can be sold to gardeners and farmers in your local area.
You can also create an online store to sell your worm castings to customers around the world. When selling your worm castings, it’s important to package them carefully and make sure that they are correctly labelled with the ingredients and directions for use.
Selling worm castings can be a great way to make a profit from your worm farm.
2. Selling Worm Juice
Worm juice is the liquid waste from the worms that just so happens to be a highly concentrated form of natural liquid fertiliser.
It contains millions of beneficial microbes that will inoculate your soil with life and nutrients in equal measure.
You can bottle this up and sell it for a premium as a natural fertiliser.
3. Selling Worms
Another way to make money with your worm farm is to sell the worms themselves. Red wigglers are the most popular type of worm for composting and gardeners and can be purchased online or in some garden stores.
You could also sell Denrobaenas which are an attractive type of worm for fishermen and exotic creatures.
When selling worms, it’s important to make sure that they are healthy and happy before selling them. You can also offer advice and tips to customers on how to properly care for their worms. Selling worms can be a great way to make a profit from your worm farm.
Making money with your worm farm is a great way to supplement your income while helping the environment. With minimal effort and a bit of knowledge, you can have a thriving business in no time.
Worm Farming For Profit: Final Thoughts
Worm farming is a fun and rewarding activity that can help you earn extra cash. It is easy to set up and requires minimal effort, making it an ideal option for those who want to make money from the comfort of their own home.
With the right location, bin, and feeding regimen, you can easily create a successful worm farm. You can also make money by selling worm castings, worm juice and worms to customers in your local area or online. With a bit of research and effort, you can have a thriving business in no time.
Have you tried worm farming? If so, how is it working out for you?
Let me know in the comments section below, I’d love to hear all about your experience.