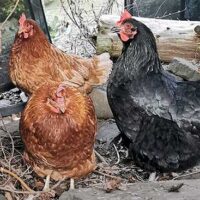
When I swap suburbia for the rural countryside, this easy solar electric chicken fence build is going to be my go-to solution for keeping foxes, raccoons, coyotes, bobcats and other predators out of my coop.
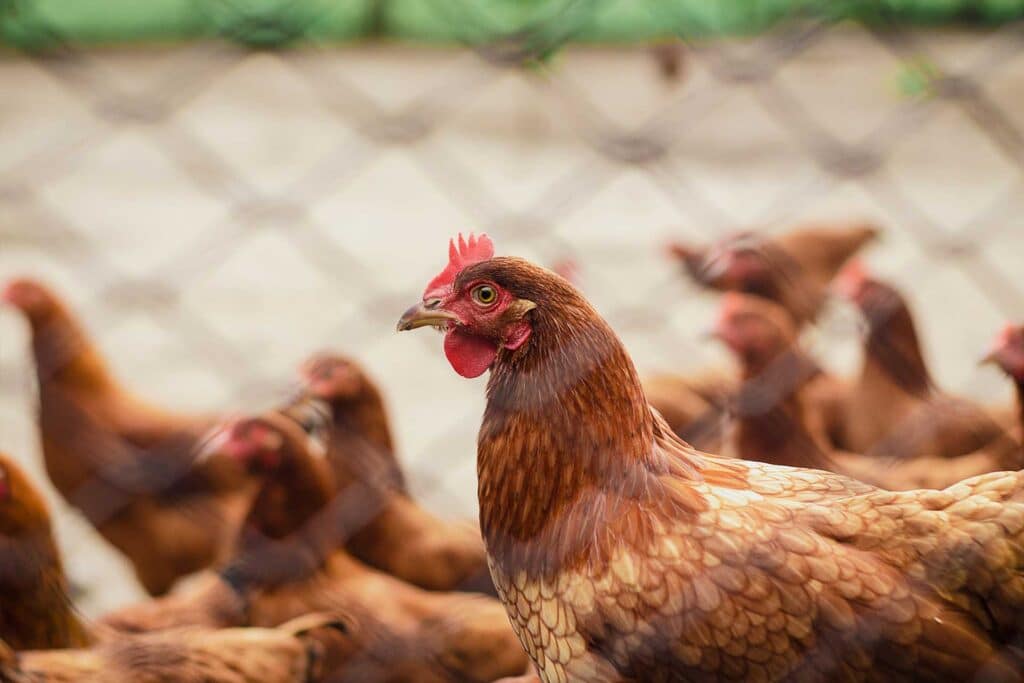
It seems a short, sharp shock to the nose will deter most predators and believe it or not, it's much easier than you think to build your own simple electric chicken fence that is off-grid and powered entirely by solar.
A solar-powered electric chicken fence:
- Won't harm your chickens
- Won't harm the predator
- Doesn't need to be in close proximity to your home
- Doesn't require a fixed electricity line
- Will remain functional – even when the grid goes down
- Will keep predators out of your run & coop
That means you can keep your chickens safe from prowling predators entirely off-grid.
Even better, this particular electric chicken fence build is so simple to set up, you can move it wherever you need to quickly, in less than 60 minutes, making it a suitable solution for pastured poultry as well as backyard chicken keeping.
The inspiration for this build comes from Robert Plamondon's Rural Life blog and some old designs I picked up from out of print chicken keeping books that you can find on my self sufficiency USB (also available as an instant digital download).
Why a Solar Electric Fence for Chickens?

Protecting your chickens from predators for ‘free' sounds to me like a good enough reason, no?
Not taking into account set-up costs of course (approx $500 for a top-rated system), which should pay you back in less than a year in energy savings and reduced chicken losses, a solar-powered chicken fence seems like a win-win.
Outdoor chicken runs are an essential component to the wellbeing of your chickens. The problem is, they're also particularly vulnerable to attacks by local predators.
Electric chicken fences are one of several deterrents you can use to keep predators out of your run and coop.
Advantages of a Solar Electric Chicken Fence vs a Traditional Electric Chicken Fence
- Long-term savings: Although solar electric fences have a higher initial cost for materials, they can save you money in the long run because you won't need to pay for electricity, and you won't have to replace batteries regularly, reducing ongoing operational costs.
- Redundancy: Solar electric chicken fences are highly redundant because they don't depend on grid power, which can be subject to outages or price volatility in uncertain times. With a solar fence, as long as there's sunlight, your fence will remain active, keeping your chickens safe regardless of the macro factors.
- Low Maintenance: Solar electric chicken fences typically require minimal maintenance. You'll need to periodically check and clean the solar panel and ensure the battery is in good condition, but this maintenance is infrequent compared to replacing batteries or dealing with grid power issues.
- Resilience: Solar electric fences can be placed in remote or off-grid locations where traditional electric fences might not be feasible due to the lack of electricity infrastructure. This makes them extremely versatile and resilient.
- Scalability: It's relatively easy to expand or modify a solar electric chicken fence as your needs change. You can add more solar panels, increase the power of the energizer or extend the fence without the hassle of rewiring or dealing with complex power connections.
- Peace of Mind: Knowing that your chickens are safe behind a solar electric fence that is powered by the sun can provide peace of mind, especially during uncertain economic or political times.
- Independence: Solar electric fences promote energy self sufficiency and reduce dependency on external energy sources. This can be especially valuable in rural or off-grid settings.
Dirk Tanner over at Tanner Farmstead uses a solar electric poultry fence to keep predators out of his pen and he says his electric fence is so good at keeping ground predators out of the pen that he often doesn't even close up the chicken coop at night!

How Does A Solar Electric Chicken Fence Work?
As predators have a tendency to slink low to the ground when hunting, you can reliably position a two-wired electric poultry fence with wires at just the right height to deliver the perfect shock to zap predators when they're sniffing for food.
In practice, a solar-powered chicken fence works like any other electric fence: an electrically conducting fence material is used to create a fence and is attached to an electric battery (or mains supply).
Every time something touches the fence; an electric pulse is sent down the wire to shock whatever is touching it.
The electric shock passes through the thing touching the fence and into the ground, causing a short, sharp shock that acts as a deterrent.
Solar Electric Chicken Fence vs Traditional Electric Chicken Fence
The main difference between a traditional electric fence and a solar powered one is that the solar chicken fence is powered directly by solar, via a solar panel connected to an energizer battery which, in turn is connected to the fence, instead of being connected to the mains electricity supply.

Build Your Own Solar Electric Chicken Fence

Now you've seen how they work, let's look at how you can actually build your own off-grid electric chicken fence.
This guide covers how to build the simple 2 wire electric fence design similar to the example on Robert Plamondon's website with a couple of improvements.
You'll find a list of components below for the 100sqm version but you can adjust the quantities to suit your own requirements.
What Components Do You Need To Build An Electric Chicken Fence
- 100m roll of single-strand electric fence wire (see example).
- Stand-off, non-conductive fence wire insulators (see example).
- Step-in fence posts (see example).
- 1 joule solar energizer (see example).
- Grounding rods (see example).
- Insulated gate handles (see example).
- Insulated gate handle anchors (see example).
What Tools Do You Need To Build Your Own Chicken Fence
- Rubber mallet
- Multi-meter
- Fence post driver
Designing Your Solar Electric Chicken Fence

I have a tendency to jump into homestead projects and many times, this keenness to get started has cost me financially and, in some cases, reduced the quality of the finished project.
Therefore, I can't stress the importance of detailed planning before you buy the components you need enough.
Some of the things you'll want to consider when planning:
- What Are You Protecting Your Chickens From:
What exactly are you hoping to achieve? What types of predators do you want to deter? What predators are historically present in your area? Be sure to design your fence style/height for the predator you're deterring. - Be Very Detailed If You Want To Save Money:
Detailed planning helps you avoid unnecessary expenses. Leave no stone unturned and be as specific as you can be about every measurement and requirement. This kind of detail saves you in material cost because you rarely overbuy after such detailed planning. - Maximise The Use Of Your Land:
Ensure that you're using the space you have available to its fullest economic potential. Plan the layout with detailed sketches and measurements and understand the placement of your chicken coop and other essential infrastructure to a T. - Check Local Regulations:
Whilst I'm all for finding whatever means necessary to work round restrictive legislation as is legally practical, it pays to know exactly what regulations might apply to you and which organisations might be employed to enforce them. Some things to look into:- Local Zoning Regulations
- Building Codes
- Animal Welfare Laws
- Neighbor Relations
- Access and Easements
- Electrical Codes
- Warning Signs
- Permits
- Livestock Grazing Regulations
- Wildlife Protection
- Consumer Product Safety Commission (CPSC)
- Utility and Right-of-Way Restrictions
- Safety:
Design a fence with the least potential to cause entanglement, injury, or escape to your chickens. And remember the safety of humans who will be interacting with the fence too, especially if you have children or visitors. - Thoughtful Design Looks Better:
Proper planning forces you to think about how your fence will look. Things that look nice give a better impression of you and your services and could even increase the value of your property. - Future Proofing:
If you plan to grow your flock in the future, will your fence grow with you? - Maintenance:
Remember you'll need regular access to the coop and fence for cleaning, maintenance, and egg collection. Make sure you plan for gates or access points that are easy to use. - Energizer Location & Power:
Because this is a solar-powered electric chicken fence, you'll need to position your solar panel at the perfect position to capture the most sunlight throughout the day. In the Northern Hemisphere, that's due south at about 45 degrees.
Selecting the right location for your fence

On speaking to poultry farmers and homesteaders who use an electric chicken fence, it seems that prioritizing proximity to the chicken coop is of utmost importance.
The reason given for doing this is that should a predator attack, chickens can quickly make their way to the coop for some relative safety and enhanced protection.
Obviously, you want to position your solar panel at the optimal orientation to ensure maximum sunlight exposure. By doing this, you'll increase the rate at which your battery recharges and provide a stable supply of power for your fence.
Finally, and probably doesn't need to be said, but site your fence on level ground whenever possible. Uneven terrain might lead to ‘gaps' in the lowest fence wire that clever predators will take advantage of.
Uneven ground also makes the general installation of the fence more complicated.
How to calculate the fence length and height based on your specific needs
- Measure the perimeter of the area where you want to install the fence. In our example, we have a 10m x 10m square area, so our paddock or pen is 100sqm in total area.
- We then need to work out how much fence wire we need. Each side of our pen is 10m and we have 4 sides, so we need 40m of electric fence wire per fence run. We'll be using two fence runs in this example, one at 5″ high and one at 10″ high, so we need to double that amount plus add extra for wrapping around posts and tensioning. 100m of electrical fence wire should be enough for us in this example.
- Calculate the number of fence posts required based on using a 2.5m distance between posts. This will ensure proper tension in the wire and maintains the effectiveness of the electric charge along the length of the fence.
- Based on the types of predators you're deterring, calculate the optimum height. In this example, we're optimizing for ground predators like foxes, raccoons and coyotes so our two runs of fence wire will be positioned at 1) 5″ from the ground and 2) 10″ from the ground.
How many joules should an electric Chicken fence Energizer be to keep predators out of my coop?

When choosing a solar energiser, remember that for every strand of electrical fence wire, the length of the fence increases. For example, in our fence we have a 10m x 10m square.
A single wire around the perimeter would need to be 40m long but if we run that up to a second level, the total wire needed would be 80m + the small 5″ height differential between the wire at 5″ high and the second wire at 10″ high.
The energizer you choose should be able to provide the required output along the entire length of the fence.
What Size Energizer Do you Need For Different Predators?
| Livestock/Predator Species | Minimum Output Energy (Joules) |
| Chickens | 0.1 – 0.2 |
| Ducks and Geese | 0.1 – 0.2 |
| Turkeys | 0.1 – 0.2 |
| Sheep | 0.1 – 0.2 |
| Goats | 0.1 – 0.2 |
| Cattle | 0.1 – 0.2 |
| Horses | 0.1 – 0.2 |
| Pigs | 0.1 – 0.2 |
| Dogs (to deter) | 0.2 – 0.3 |
| Foxes | 0.2 – 0.3 |
| Raccoons | 0.2 – 0.3 |
| Coyotes | 0.2 – 0.3 |
| Bobcats | 0.2 – 0.3 |
| Mountain Lions | 0.2 – 0.3 |
| Hawks and Owls | 0.3 – 0.5 |
| Bears | 0.3 – 0.5 |
How To Install A Solar-Powered Electric Chicken Fence: Step-by-Step
I'll use images by Peter Cowin aka The Bee Whisperer (seen in the full video below) to help illustrate the process step by step.

1. Physical Site Inspection
You should have covered this in your planning stage but just in case, before you begin the installation, give your physical site one final ‘walk over'. That is, actually walk round the site and make sure everything is as expected.
Be sure to check elevation, orientation and obstructions. You need the solar panel to be in direct line of sight with the sun at all times if possible.
Ensure that all grass is cut below the height of your first wire (5″) or that grass won't grow up and into the fence by adding weed fabric or mulch.
2. Insert Your Fence Posts

Start inserting your fence posts around the perimeter. Be sure that they are no further apart than 2.5m per post.
Add two extra posts into where your gate will be located to mark either side of the gate.
3. Attach Gate Handles
In Peter's video, he uses rope to attach the gate handles to the posts. This method will work for the step-in style posts but you'll need some gate handle anchors if you're planning on using a wooden post.
Create 3 loops with your insulated rope and hook them around the step-ins on one of your gate posts.

You should position the loops at the appropriate height where you want to run your electric fence wire.
In our case, that is at 5″ and 10″ high.
Hang the insulated gate handles on the loops ready to be connected to the fence wire later.
4. Insert Ground Rods
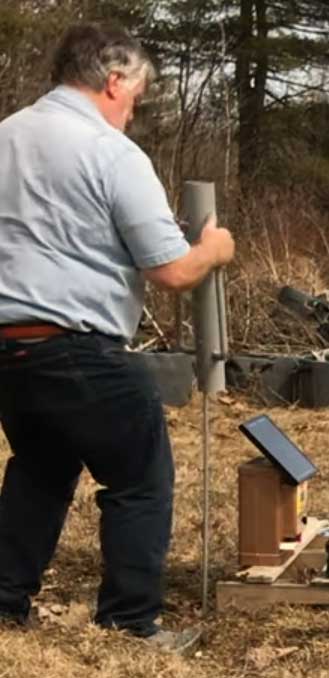
Use a fence post driver to drive your ground rod(s) into the ground to the correct depth required by your system.
The first ground rod should be close enough to the energizer location that you can connect the energizer to the rod easily.
If you require more than 1 ground rod, position your extra rods at least 5ft away from the first rod and wire them in series.
How Many Ground Rods Do I Need?
Premier 1, a leading provider of electric fences, recommends 3ft of ground rod per joule of output from the energizer. So, for example, if your energizer outputs 1 joule, you'll need 3ft of ground rod driven into the earth.
If not enough ground is used, only a partial amount (not full strength) of the pulse will be returned to the energizer.
6. Position Your Energizer
Finalise the positioning of your energizer.
If you're using a solar energizer, you could mount this on a custom-built frame, a tree or even leave it on the ground like Peter does in his video.
For the simplest of installations, a ground-mounted solar energizer works fine.
7. Connect Your Energizer To Your Grounding Rod
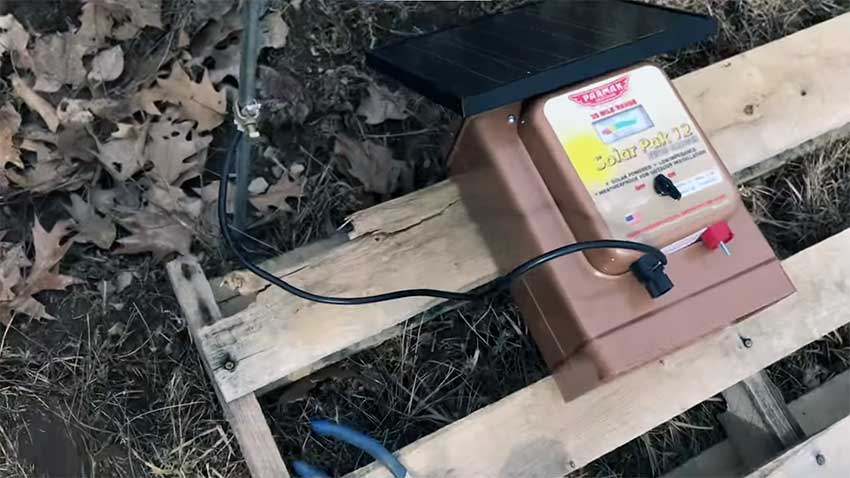
Use insulated wire to connect your grounding rod to your energizer. Make sure to connect at the ground connection on the energizer.
If you are using more than one grounding rod, connect them all in series now.
8. Connect Your Fence Wire To Your Fence Posts
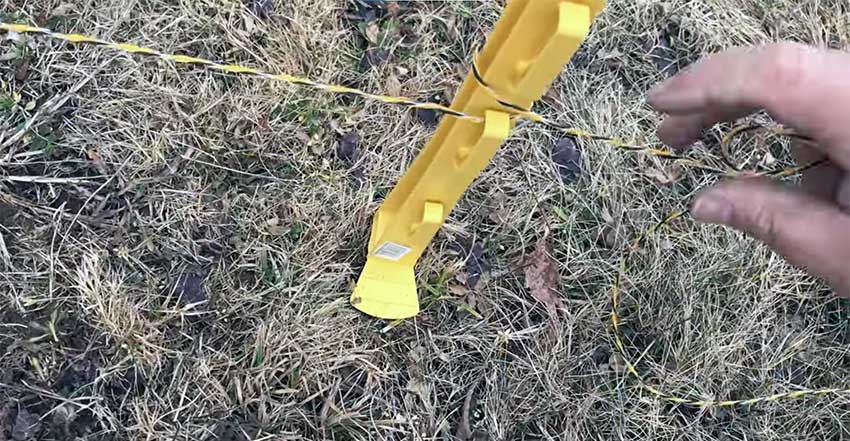
Extend the wire from the gate handle to the first fence post and clip it into place.
Wrap the wire another time in a loop around the post and extend the wire out to the next fencepost.
The best practice for doing this according to Peter is to start at the lowest/bottom run of fence wire first.
In our example, this would be the 5″ high fence wire.
Continue until you reach the last fence post of the lowest run.
At this point you need to go up to your next run at 10″ high, so take the electric fence wire around and then up, then back out the way you came in at the new level like shown in the image below.

Continue back round the fence until you reach the 2nd gate handle.
If you are planning to have more than 2 runs of wire, you would go up again at this juncture but because this simple electric chicken fence design only uses 2 runs of wire, we can tie off the fence wire once we've completed our run back round to the second gate handle at 10″ high.
9. Connect Your Energizer To Your Fence

Make sure your energizer is turned OFF.
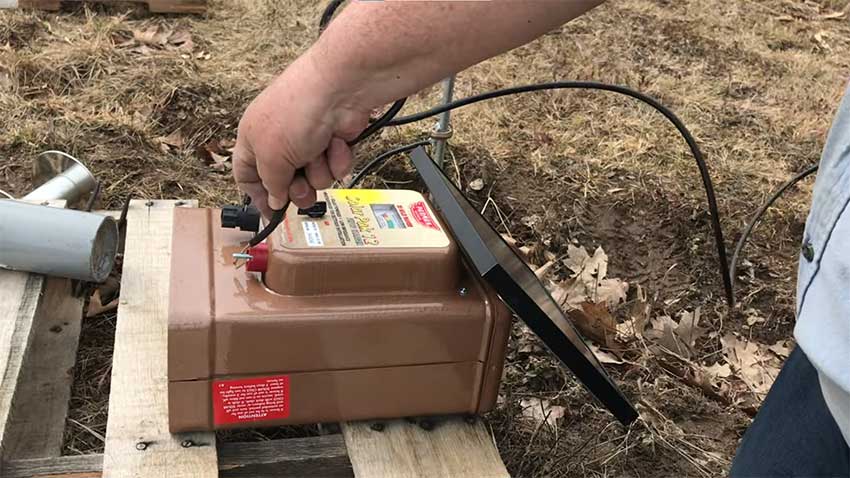
Connect an insulated wire from your energizer to your fence.
This will complete the electrical circuit so be sure it's not switched on when you do this.
In Peter's example above, he uses aluminium foil wrapped around the connecting wire and the fence to ensure a solid connection.
10. Switch On Power And Test Electric Fence

Now that you have a complete circuit. Give everything one final check over before proceeding to test.
Have your dedicated electric fence tester or multi-meter at hand ready for the test.
Read instructions carefully and be sure to have your fence tester or multi-meter grounded for the test (with one wire into the ground before you touch the fence with the other).
Electric Chicken Fence Maintenance Tips
- Keep grass and weeds and other vegetation free and clear from the wires. If anything should touch the wires, it will reduce the energy of the ‘pulse' or shock felt by the predator and may not be enough to deter it from the coop.
- Check your solar energizer and battery regularly.
Troubleshooting Electric Fence Problems
Are Electric Chicken Fences Safe?
Yes, electric chicken fences are perfectly safe providing the correct energizer and electrical output is used and the system is well maintained.
They are designed to administer a short, sharp shock to any predator that does not harm the predator but merely causes enough confusion to deter it from coming back in the future.
How Much Does An Electric Chicken Fence Cost?
This particular chicken fence with 100sqm of space using a two-wire system with a 1.2 Joules solar energizer will cost approximately $500.
You could save on this amount if you buy an energizer with less output or if you buy a used energizer from 2nd hand marketplaces like facebook marketplace. 2nd hand marketplaces are full of solar fence components you can pick up cheap.