
My gravity fed watering system may not be the prettiest, but it is beautiful. It stores 2000 litres of freshly harvested rainwater and distributes it automatically to my garden beds.

It was fairly easy to setup with some basic DIY skills.
The principle of the system is simple:
- You have a tank full of water somewhere on your property situated at a higher elevation than the area you are watering.
- When you need water and you open the tap, gravity forces the water down the irrigation line (a hose, in my case) to your beds.
It took me a good few days to research the most appropriate way to build my gravity-fed watering system but I eventually settled on a design that suited my needs and built my own.
In this guide, I'll go over the entire build and explain how I put it together and include as many pics as I can.
The whole system cost me about £200 but you could significantly reduce this if you already own old hoses, sprinklers or water butts that you're happy to repurpose for this project.
Enjoy!

What Is A Gravity Fed Watering System?
A gravity fed watering system is a type of automated watering system that uses the force of gravity to automatically send water through your irrigation line (a hose) to be distributed to your garden (or greenhouse in my case).
It is an excellent example of a low-tech method for generating your own power (in this case; water).
It achieves this by being at a higher elevation than the watering destination (your grow beds).
Theoretically, you could top up the system from any source; mains, rainwater, lakes, rivers etc. as long as it can collect and distribute water automatically from a higher elevation.
In my case, I wanted a completely autonomous, automatic, low-tech, zero energy system so I opted for a rainwater harvesting version connected directly to my garage guttering.
In a nutshell, my gravity fed watering system is a self contained, off grid automated watering system that gets topped up when it rains and has the capability to automatically water my greenhouse without my input.
I was able to achieve this by connecting two 1000 litre tote tanks to an automated timer.
This is pretty amazing to me because prior to the new system, I would spend about an hour each evening watering my greenhouse and now I spend that time with my family at the end of a long day.
Different types of automated watering systems
During the course of researching how to build my gravity fed watering system, I considered a number of different options: mains powered, solar powered and completely mechanical.
I didn't want to be attached (ergo dependent) on or to the mains in any way so I had to build either a mechanical or solar powered automated watering system.
Mains powered automated greenhouse watering system
The fully mains powered systems were systems that needed to be connected to the mains water supply and required some kind of electrical input to control the flow of water.
I neither wanted to be attached to the mains or use electricity to water my greenhouse so I scratched this off pretty quickly.
Solar powered automated greenhouse watering systems
Solar powered systems could either be connected to mains water supply or completely off grid. I call them solar powered watering systems because they use solar power to control the flow of water; via a pump.
The #1 problem I found with solar powered automated watering systems was that they seemed to be quite expensive. I came across several automated solar powered tap timers, but they all required some kind of battery backup.
When compared with their mechanical or purely battery powered alternatives, the price difference was significant and enough to put me off the idea of choosing a solar powered automated greenhouse watering system.
Mechanical automated greenhouse watering systems
Mechanical automated greenhouse watering systems are essentially a mechanical tap timer attached to the water outlet at one end and your hose at the other. They can take water in from either mains or be connected to off-grid water collection systems.
They were also the cheapest option but their features seemed greater or, at the very least, comparable to the other options.
There was also way more choice and availability in this particular category of systems; notably in the type of water timers that were available.
The mechanical tap timers varied between being 100% mechanical or powered by batteries. The problem I found with the purely mechanical options were that they seemed to offer only one watering session per routine.
For example, you could set the watering duration to whatever you wanted but you couldn't set the frequency of waterings per day. At least that's what I found.
As soon as you decide to use a battery powered version however, the frequency and duration of watering options is almost infinite.
In the end, that's why I chose the aqualin battery powered mechanical version to power my watering system.
Aqualin Battery Powered Mechanical Hose Timer
The Aqualin timer has two hose outlets (creating 2 separate watering ‘zones') and battery-powered ball valve timers to set both the frequency and duration of watering.
My thinking was I could have zone 1 for the raised beds and zone 2 for the seedling beds.

How to build an automated gravity fed watering system
There are many ways you could go about building an automated greenhouse watering system but I wanted to build something very low tech and very simple.
My thinking was the simpler my design, the less chance there was I would be repairing it in a year’s time and the less dependence on replacement parts I'd need to be in the future.
The Basic Principle
The basic principle of what I wanted to create was to have rainwater run off my house/garage roof and into a water storage tank.
From there I wanted to automatically water my greenhouse at given intervals.
The first thing I thought of was to use some kind of solar powered pump that would pump water from the storage tank through the hose at the given intervals that I needed to keep my vegetables watered.
I then began to discover that choosing a pump with enough power from solar was a little harder than I first imagined.
Then I had a bit of an epiphany. My garden is on a slope. I had heard about how some farmers used water storage tanks stored at higher elevations than their vegetable gardens to gravity-feed water through their irrigation lines and water their veg.
The increase in elevation (and thus, pressure) allows gravity to help push the water through the pipe.
With this spark of inspiration in my mind, I began to imagine somehow raising my water storage tank off the ground at a height that would allow gravity to take care of the water flow.
If I could make this, then the only problems in my design that needed solving were how to stack the storage tank high and how to automate the flow of water.
There was one calculation to make though; how much pressure was I going to get from my elevated water tank, and would it be enough to automatically feed my hose?
How much water pressure from an elevated water storage tank
An excellent resource for calculating this for your circumstance is the series of tutorials available at irrigationtutorials.com.
From these tutorials, I was able to work out what my potential flow rate was at the water inlet measured as GPM (gallons per minute) and what my potential water pressure was at any given elevation.
From this information, I discovered that at the elevation I was planning (2 metres) I would not have the PSI required to use a completely mechanical valve to open my tap and automatically water my greenhouse.
According to Jess over at Irrigation Tutorials, a completely mechanical timing valve with a typical solenoid needs a water pressure of 15 PSI to work.
The specific formula used to calculate PSI is the number of feet off the ground your storage tank is (or from the point where your irrigation system opens) multiplied by .433.
For example, two metres is about 6.56 feet of elevation, and 6.56 * .433 is only 2.85 PSI.
To learn more about the figures used in this calculation, visit irrigationtutorials.com.
It turns out though, that a battery powered mechanical timing tap with a ball valve will open up at any PSI. This discovery only served to further my confidence that I had selected the correct automated watering system for my needs.
The Schematics Of My Automated Greenhouse Watering System
By the time I had done my calculations, this is the schematic (if you could call it that!) of my gravity fed automated greenhouse watering system.

Components / Part List
I've included a list of all the components I used to build the automated watering system. You can click on any of the items to see it on amazon where available.
- 2 * 1000 litre IBC Food Grade Totes
- 40m 1/2″ hose pipe
- External tap (BFG Diamond Garden set: tap EN 13828-A-Cu with ball valve type 2500 and PE wall plug fitting)
- IBC fittings:
- 1/4″ MDPE pipe
- Irrigation kit including drip emitters & pipe
- Pipe clamp
- Black plastic wrap
- Rainwater diverter
Installation: Choosing A Site
The key components of your gravity fed watering system are collection of water and gravity; specifically:
- How will your system get topped up?
- Will you have enough elevation to distribute water?
In my case, I was planning on harvesting rainwater directly from the roof of my garage and diverting it into my water tanks.
Therefore I decided I wanted to install the water tanks as close to the source as possible. So, right up against the wall close to the down spout of my gutter.

You'll notice in the image above that the rainwater diverter catches rain in the downspout and then diverts it via the black pipe horizontally to the right and into the water tank.
This is the correct way to pipe up a rainwater harvesting system. The reason you connect the pipe horizontally to your water tank and not vertically (so it slopes into your tank) is so that the water tank can't overflow and have water spilling out of the top.
When water in the tank rises above the level of the diverter it will flow back into the diverter and then down the pipe as normal.
Elevation
The second essential factor is elevation. You need to find a way to raise your water tank above the level where you want your water to distribute to.
In my case, I already had a double-banded raised bed in that location which wasn't being used for anything so I could stack my tanks on top that.
In hindsight, I should have had something even higher but I thought when I set my system up that the height of the second tank would be high enough to create enough flow and pressure to water my greenhouse 40m away.
Important Design Observation
Once the water level gets below 200 litres in the top tank, the pressure is still enough to water the full line but it drops significantly at the final 5 drip emitters.
When the top tank has over 200 litres of water in it; it creates enough pressure to water the greenhouse fully.
Below that point and we just make it to the end of the hose (about 40m away) because the lower tank doesn't have the elevation on its own to feed it at a high enough pressure.
The lesson learned then, is to have your water tank at least 1.75m above your irrigation emitters – which is about the height of my top tank.
Installation: Setting Up The Tanks
The basis for the build was the 2 1000 litre IBC food grade tote tanks.
These were the most expensive item in the build. They cost me £60 each. You could remove this cost if you had an existing water butt that you wanted to repurpose for this project or you didn't need two of them.
The system would work with only 1 tank if you could raise the elevation of the tank to 1.75m high.
- Flushing the tanks
- Stacking the tanks
- Connecting the rainwater diverter
- Connecting the tanks
1. Flushing The Tanks
I made the mistake of not flushing the tanks after I'd received them. I just assumed that because they were food grade tanks, they'd be safe to use straight away but I was wrong.
What I discovered after about 3 weeks of collecting rainwater in them was that the leftover caramel syrup in the tanks, when mixed with the rainwater, was starting to ferment.
It made the water smelly and was starting to congeal on the inside of the tank. As soon as I noticed this I drained the tanks completely and then rinsed them out thoroughly with soap/water and let them dry in the sun for a few days before I set them up again.
2. Stacking The Tanks
Once I had selected my site, I had to stack the tanks one on top of the other.
When you order your food-grade tanks, make sure they come on stacking pallets so that you can actually stack one on top of the other.
I was able to put the lower tank into position fairly easily. It was straightforward.
The upper tank was not so easy. I had to remove the upper tank from the steel cage to lift the cage into position first, followed by the tank itself because it was too heavy and cumbersome when all together. In hindsight, 2 people would have made the job easier.
It was cumbersome but not difficult to do.
3. Connecting The Rainwater Diverter
Once the tanks were stacked one on top of the other, I had to connect the upper tank to the rainwater diverter attached to my down spout.
To do this; I had to first fit the diverter to the downspout at the correct height based on where my tanks were sitting.
This was again fairly straightforward but could be a little frustrating if you've never done any DIY or have the tools for the job.
To fit the diverter, you need to cut away a section of your downspout and then replace it with the diverter. I measured the height of the diverter and then used a simple hacksaw to cut away the appropriate height of downspout before replacing the cut-out section of downspout with the diverter.
Once the diverter was fitted to the downspout I had to connect the pipe to the top tank at a horizontal angle.
To do this, I needed to drill a hole into the tank where the diverter pipe would connect to and use the supplied fittings to fasten the pipe to the tank.
This was straightforward in principal but in hindsight I would have drilled the hole and fitted the connector into the upper tank before lifting the upper tank into position because it made the job much more complicated (on a ladder and then reaching up and over and into the tank to fasten it).
4. Connecting The Tanks.


Although seemingly straightforward, this was a pain in the ass to get right.
The theory was sound:
Use an elbow connector to connect the top tank to a 30mm MDPE pipe that would connect down to the lower tank via a T connector.
The T connector would then connect to the tap.
The biggest problem I faced at this stage was that the elbow connector on the top tank was not long enough to protrude out past the metal cage and plastic pallet tray so that it was impossible to get a completely flush, square connection on the MDPE pipe connector.
The elbow connector could have done with being an inch longer and I would have been able to get a flush fitting.
The solution, perhaps, would have been to use an IBC to MDPE straight connector rather than an elbow connector out of the top tank.
Nevertheless, I did manage to tighten it enough (with the help of some pipe grips) so that there are no leaks.
Connecting the lower tank to the tap was straight forward because the T connecter was longer and protruded out past the plastic and metal cage so it was able to be screwed in properly.
I added another length of MDPE pipe from the lower T connector to my tap, which I screwed onto the wall for convenience.
Installation: Adding The Timer & Irrigation System


Once the tap was screwed onto the wall and connected up to the T connector via the MDPE pipe, fitting the aqualin timer was easy. It simply screwed onto the end of the tap.
I did, however, have to use white plumbing tape to wrap around the threads of the tap to make the connection between the timer and the tap completely water tight. I tried a couple of times without the plumping tape and got leaks so this really made a difference.
The aqualin timer's pipe fittings are compatible with the ‘hoselock' style garden hose connector so i was easily able to connect an old, unused hose to the timer.
You can see in the picture above I only connected ‘Zone 1' at this stage. There was another hose connector on the timer which you can just see in the picture that would allow me to connect a ‘Zone 2' in the future.
Repurposing An Old Hose Into My Automated Watering System
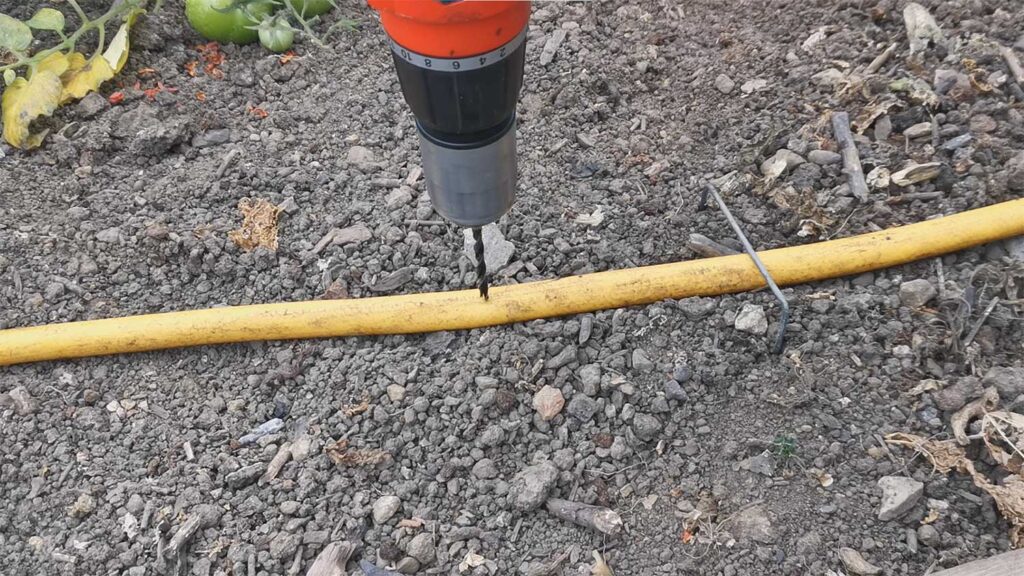
You can buy specialist irrigation hoses but you don't really need to at this scale.
All I needed to do was connect my old 40m standard garden hose to my aqualin timer and it would allow the water to flow at the set times.
What I did need to do though was:
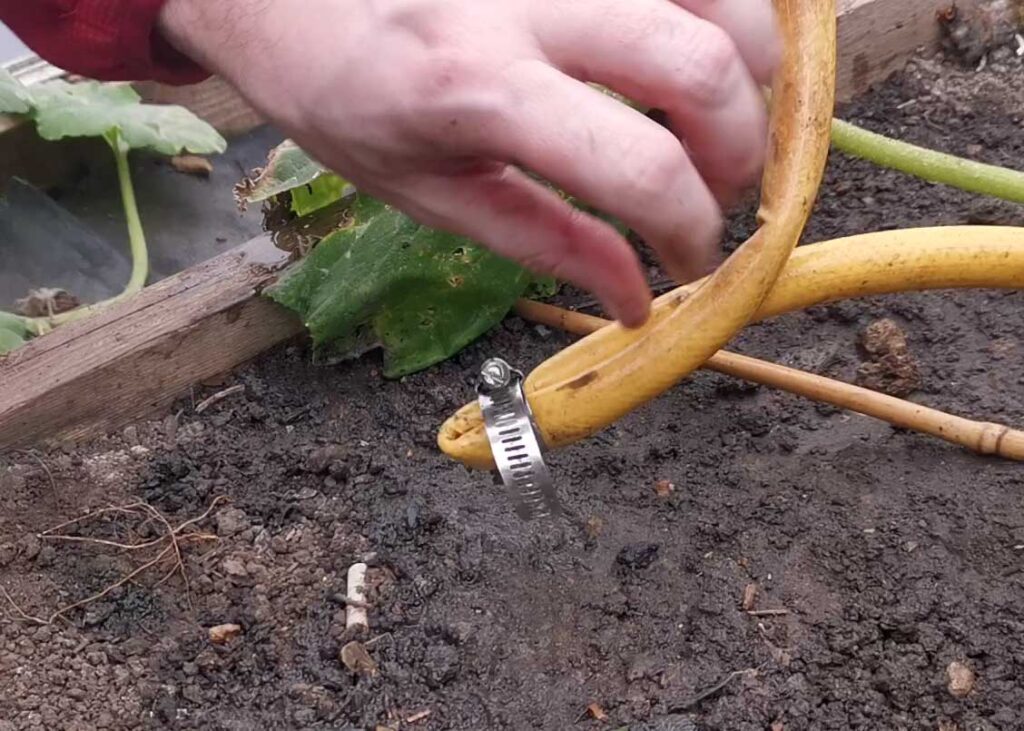
- Cap off the end of the hose to stop water from flowing out the end.
- Drill some holes along the length of the hose where I wanted to insert my drip emitters.
Both these were straightforward. I kinked the end of the hose up (folded it back onto itself) and fastened it in place with an old pipe clamp I had lying around.
As for the drilling; I had to make sure I was drilling holes that were slightly smaller than the emitter connectors that came in the drip irrigation kit.
Adding The Drip Emitters
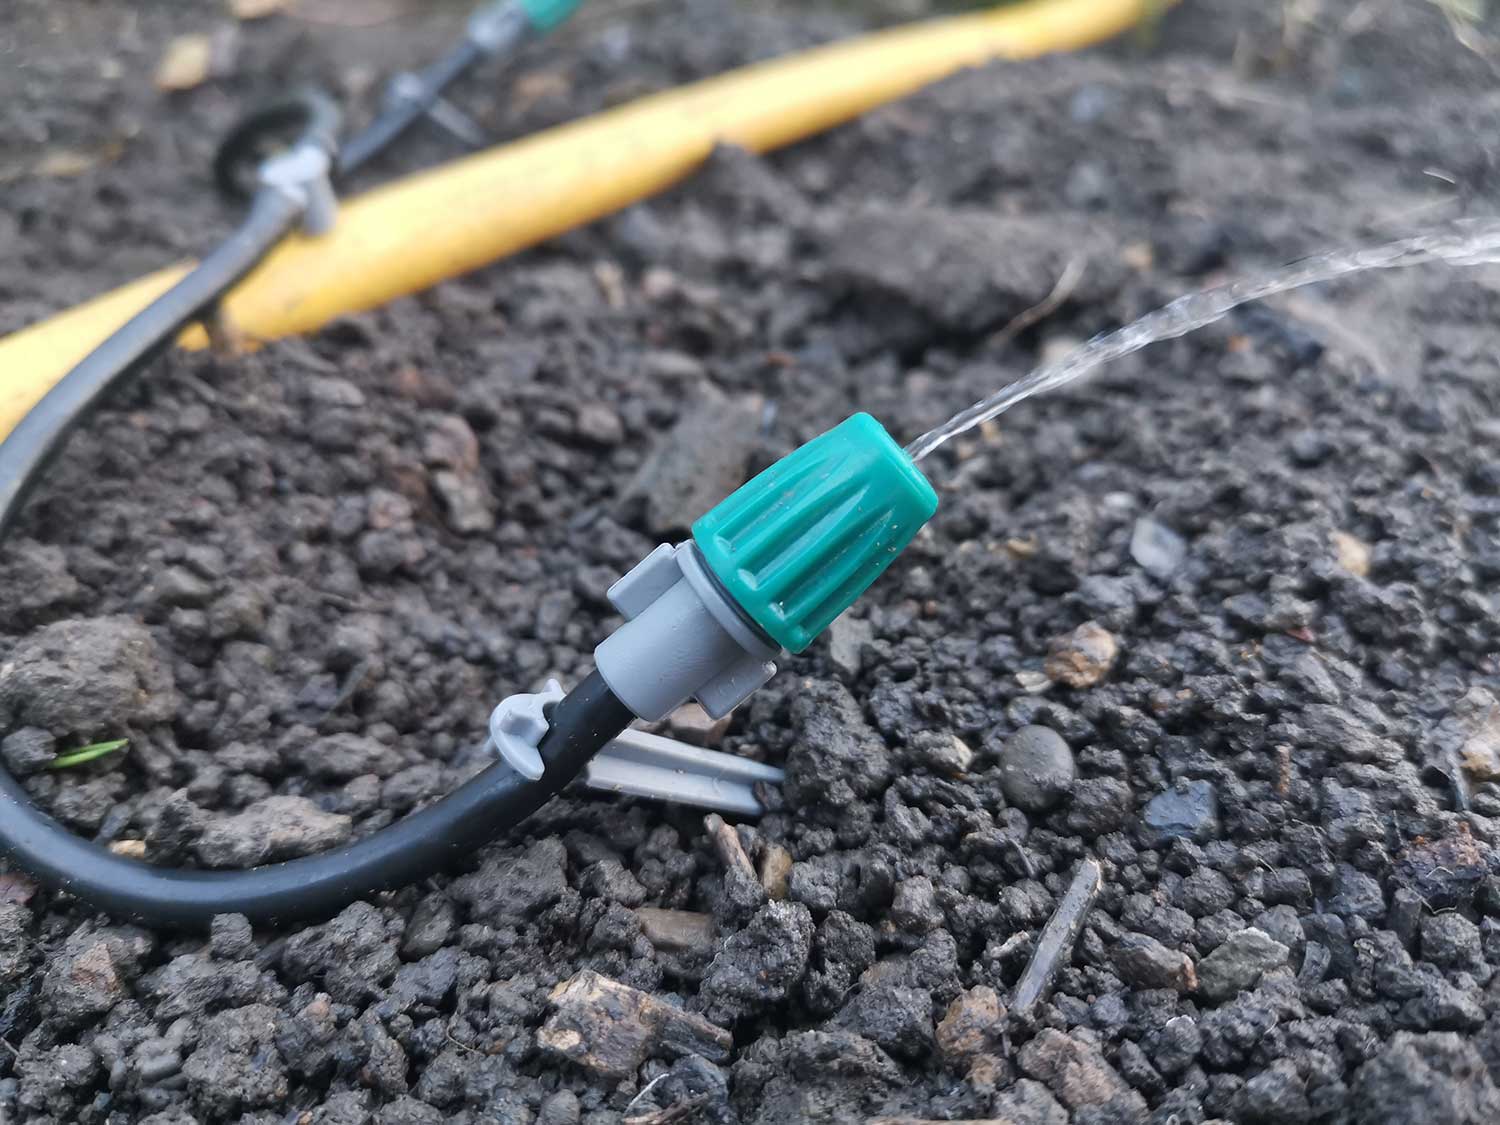
The final stage of the build was adding in the drip emitters at the drilled holes. This was quite time consuming and was the first time I had used drip emitters before.
I learned that some styles of emitter are better for different kinds of coverage. I used mixed emitters in my line (the ones that came with the kit), but if I were doing it again I would specifically choose the emitters that spin and spray water across a wider surface area rather than the simple drip, drip or fountain style.
The only complication at this stage was making sure the drilled hole was not too big that the emitter would pop out and that the smaller irrigation tubing was fastened tightly over any connectors to ensure no leakage.
This attention to detail was the main reason why this stage of the build took so long.
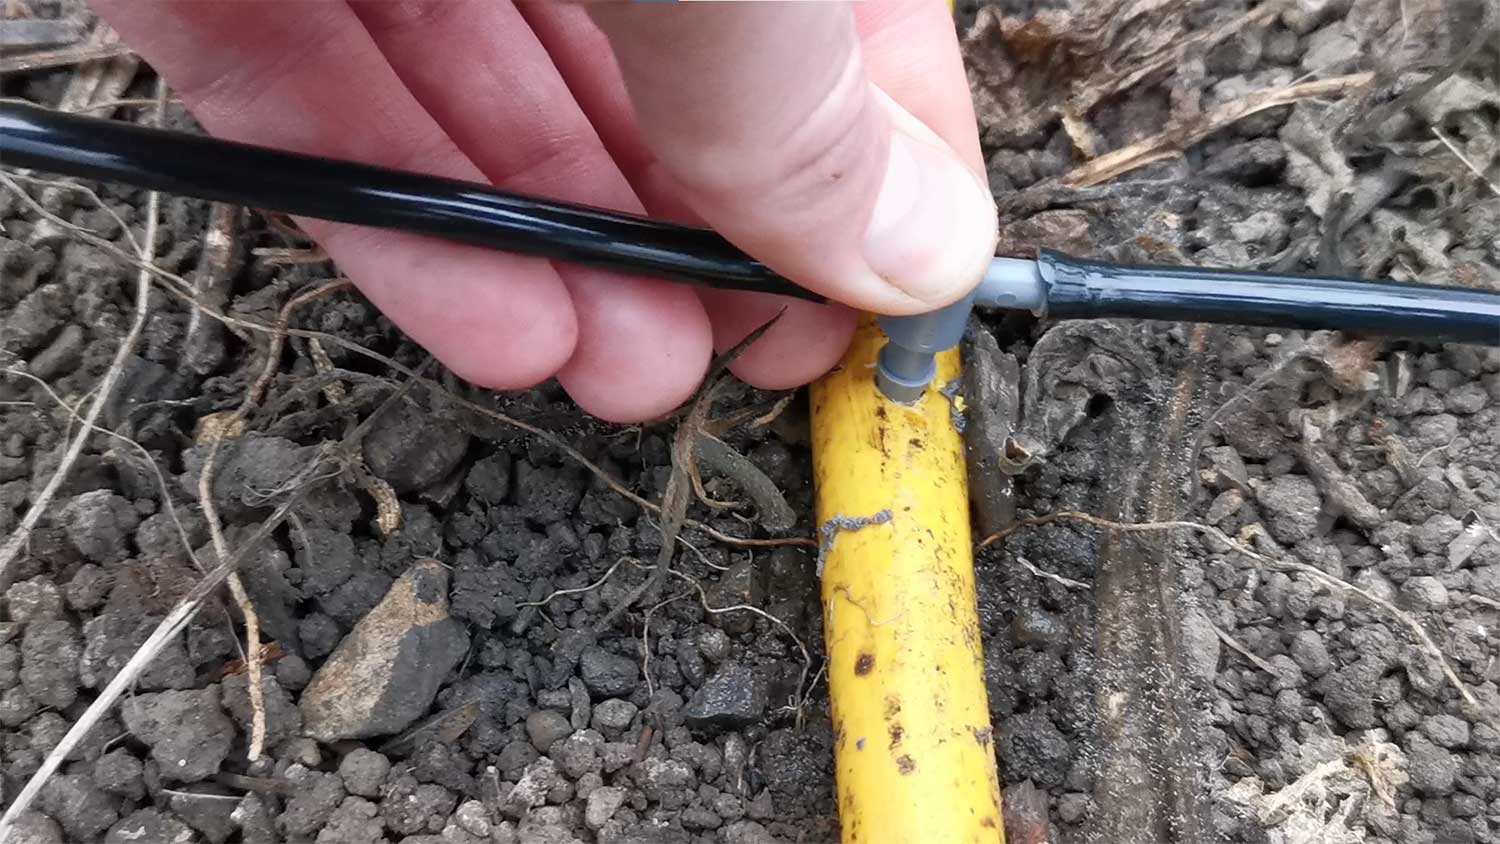
To add the emitters:
- Drill a hole in your main garden hose where you want to drip out from
- Cut and connect an appropriate size irrigation tubing
- Push the irrigation tubing onto the small plastic connectors that connect the tubing to the main garden hose
- Insert the plastic connectors into the main garden hose with the drip emitter attached


Wrapping Tanks In Black Plastic To Prevent Algae Growth
The final stage of the build was wrapping the tanks up, or rather the cages, in black plastic packaging wrapper to prevent light from getting to the water and encouraging algae growth.
This would be better done on the ground, before setting the tanks in position, and perhaps directly around the tanks themselves rather than the cages.
My solution worked, but I think it could be done better.

How To Improve My Gravity Fed Watering System Design or, what I learned after a year
After a year of using this system, there are definitely some improvements I would make if I were to do it again.
- I would consider using only 1 tank and raising it's elevation to at least 1.75m high. Of course, your ability to do this would depend on your water source.
- I would use a different connector on the upper tank to make sure it protruded out beyond the cage and therefore ensure a flush seal.
- I would use a consistent drip emitter type, rather than mix and match like I have and my preferred choice for a raised bed situation would be a drip emitter that sprayed water over a larger surface area rather than drip.
- I might add a fertiliser tank to the line to add a small amount of fertiliser to the water.
Overall though, I am very happy with my system and am looking forward to becoming more self sufficient in food as I use it.










Great Stuff Seb. I love all this creative out the box thinking
I’m looking at building a guttering water system with capillary matting wicks for the plant roots to suck up what water they need.
Where did you get your IBC tanks? I’m struggling to source them for anywhere near that price.
Thanks for taking the time to comment, Dug.
Yes, wicking is something I’ve considered in the past. I would be very much interested to learn how you go with your project – maybe even share it on here if you’re up for it?
I got my IBC tote tanks from a local supplier here in the North East of UK…I believe it was Wear Valley Tanks.
£60 each delivered. As I said in the article, I don’t think you need two (unless you need the volume of water). I got two to stack upwards to try and create enough head pressure for the water using height but I think the lower tank is wasted for this purpose.
One tank raised about 1.5m off the ground will give you enough fall, flow and pressure to do about 40m via drip emitters.