I want to make preserving – making jam – something you will think easy to do at home. In this guide, I'll share with you my recipe and method for making 6 jars of apple and blackberry jam from freshly foraged fruit for free – or almost free.
Apple and Blackberry Jam Is So Easy To Make
Most of what we use to make it you already have in your kitchen and if you have foraged fruit, the only thing you will need to buy is sugar.
My local blackberry bushes fruit early, so I make blackberry jam at the start of the season, and mixed fruit jam like apple and blackberry jam when the plums and apples are ready.
If you want to make jam for free; get out into the wild and pick some apples and blackberries at the end of summer.
One year I was even given damsons. All these make good jam. There is a separate guide if you want to know how to make jam without pectin.
Make Apple & Blackberry Jam: Getting Started
To get started you will need:
- About 6 clean 12oz glass jam jars with screw top lids.
- Fruit and an equal weight of sugar.
- Weighing scales, for the above.
- A medium to large sized saucepan.
- A wooden spoon – a metal one will get too hot.
- A ladle to scoop the hot jam out of the pan and into the jam jars.
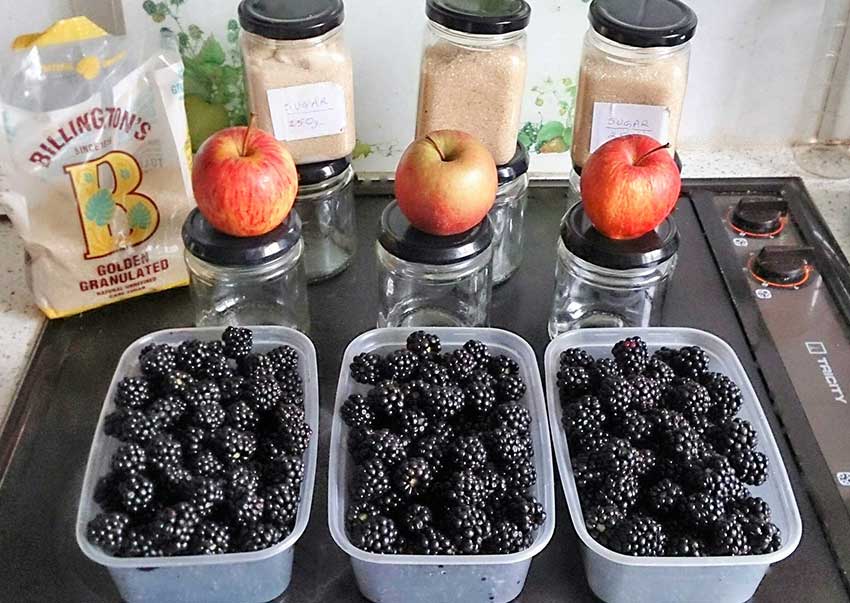
Fruit and sugar ready for making jam.
Each punnet is about 12 oz, with an equal weight of sugar it will fill about 6 x 12oz jars. For mixed fruit jams, like apple and blackberry jam, the same rule applies; equal weight sugar and fruit.
Cooking the fruit
Cook the fruit gently first, so it is soft and mushy and represents the consistency you want in the jam. Once you add sugar, the fruit will not soften further.
The cooked fruit should take up one quarter of the pan – otherwise move it to a bigger pan.

Adding the sugar
Add the measured sugar and stir with a wooden spoon until the sugar is dissolved, then turn up the heat to make jam.
You may want eye protection as a precaution at this stage. Also, be careful not to get hot jam on a ceramic hob.
What Happens If Hot Jam Falls On A Ceramic Hob?
High sugar or high salt recipes like jam can cause corrosion on ceramic hobs if not cleaned immediately after they've fallen onto it.
Boiling for a Set

For a small batch cook on a high heat for about 5 minutes: the small bubbles will foam and rise in the pan which is why you need such a big pan.
As your jam nears setting point, the bubbles will subside into a slow boil and scum will start to collect at the edges of the pan. When this happens, the preserve is ready for testing.
To test your jam:
- Take the pan off the heat and put half a teaspoon of the hot mixture onto a cold saucer or small plate.
- Wait a few minutes for it to cool, and if it forms a skin and wrinkles when cold, the jam has reached setting point. If not, boil the mixture for a few more minutes and test again.
Once the jam reaches setting point, take the pan off the heat.
Filling the jars
Your jam jars and lids need to be undamaged and scrupulously clean. Then:
- Fill the jars with hot (not boiling) water and leave a few minutes so the jar feels hot to the touch, to reduce thermal shock when you add the jam. Or you can keep the dry jars hot in the oven (but not the lids).
- When you are ready to fill it with jam, empty out and carefully dry one hot jar. Mould needs only one drop of free water to grow.
- Fill the jam jar to the shoulder while the jam is still hot – but not boiling – for best results. You will need a ladle for this.
- Wipe clean the screw threads on the jar; then wipe the rim of the jar where the seal will sit; dry the lid and screw the lid onto the jar.
- Repeat from step 2 for the next jar.
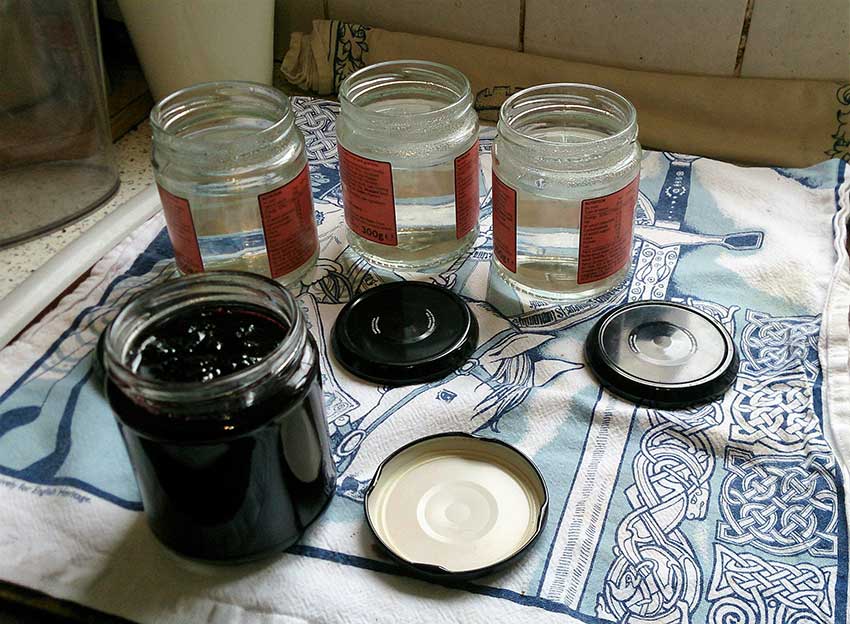
Each lid has a thin rubber seal and a central test button.
Seal, Test and Label
When the jam in the jars has cooled completely, lightly touch the centre of the lid.
If the test button in the centre of the lid clicks and stays down this indicates a good airtight seal, and a partial vacuum in the air space inside the jar. These jars will keep the longest.
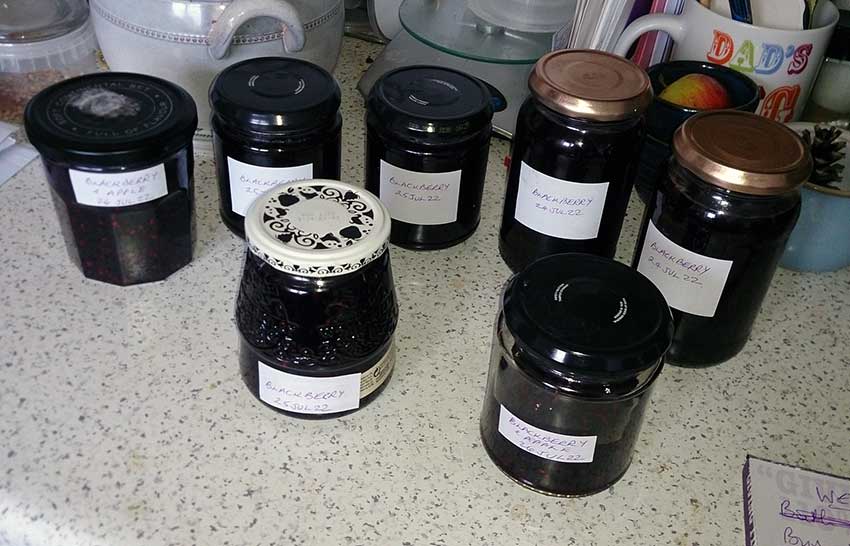
Tip the jar a little to see if the jam has set. Label the jars with the date and the % of sugar used. Use the ones with least sugar first.
Jars that don’t seal
If you can push the test button down, but it pops straight back up then the jar may not be airtight.
This means the pressure inside and outside the jar are equal. It's how we know if a jar has been opened.
Things that will cause this:
- Not screwing the lid down completely
- Jam wasn’t hot when you screwed the lid on
It’s not the end of the world. I keep these in a cool, dry cupboard and use them in the first month.
This is different from bottling because bottled fruit has abundant free moisture in the bottling liquid and so must be perfectly sealed to avoid contamination.
Bacteria, yeasts and mould thrive only if moisture is present. With jam, the moisture is locked into the preserve which is why the ‘set’ is more important.
Storage is also a factor – a cool, dry cupboard or larder is ideal. If jars of jam may experience damp conditions, use bottling jars and seal as for bottling.
The University of Minnesota Extension has a thorough guide to jam making if you want to expand your knowledge after you've finished reading this.
How Long Does Homemade Jam Last?
If you're not going to water bath can the jam, it will last 3 months in the refrigerator.
If you are going to water bath can the jam, it will last up to 2 years.
See our full reference guide showing how long different preservation methods for jams will last.
Cook’s Tips
Jam is one of those essential food preserves you need to know how to make because it has so many uses.
Culinary Uses:
- Spread on Bread & Toast: The most common use. Pair it with butter or just by itself.
- Mixed into a fruit crumble: Remember jam already contains 50% sugar.
- Toppings for Desserts: It can be drizzled over ice cream, cake, or other pastries.
- Filling for Pastries: Think of doughnuts, croissants, and tarts.
- Ingredient in Baking: Used in thumbprint cookies, jam bars, and more.
- Pancake and Waffle Topping: As an alternative or in addition to syrup.
- Sandwiches: Combined with peanut butter in PB&J sandwiches or with other spreads.
- In Yogurt and Oatmeal: Adds a sweet, fruity flavor and texture.
- Marinades and Sauces: Some meat dishes use jam to add sweetness and depth.
- Salad Dressings: Mix with vinaigrette for a fruity twist.
- Cocktails and Drinks: Some beverages use jam as a sweetening agent.
- Homemade Popsicles: For a fruity addition.
- Cheese Pairings: Especially soft cheeses like brie or cream cheese.
- Glazes: For meats like chicken or pork.
Non-Culinary Uses:
- Gifts: Homemade jams are cherished gifts, especially during holidays.
- Crafts: Used in creating decorative jars and other homemade craft items.
- Education: Demonstrating principles of preservation in biology or home economics.
- Skin Care: Some believe certain fruit jams can be used as face masks, but be cautious and test any allergic reactions.
- Economic: Selling homemade jams at farmer markets or small businesses can be a good way to make extra money from your homestead or land.
- Decorative: Sealed jars of colorful jams can be a kitchen decoration.
Because blackberries are best processed the same day, I will often cook them and leave them in the fridge overnight, then add sugar and make them into jam the next day.
Happy foraging !