On your sacred journey to become more self-sufficient, choosing between building your own DIY log store or building another raised bed for vegetables is a tough choice. Should you grow food to eat or dry wood to keep you warm? 🤔
Well, in this diy log store guide, I'll smash the myth that you need to compromise on one or the other and show you how you can dry wood and grow food in the same space.

Like you, I was faced with the planned & increasing energy costs for gas and electric.
Along with my desire to get off grid and generate my own power by 2025, keeping myself and my family warm is of utmost importance. That's why I decided to retro fit my house with a wood burner.
My thinking was that if the power goes out, at least I'll be able to burn the stuff I don't need to keep my family warm! Of course, I'd rather burn good, clean and dry logs (rather than furniture) in a pickle, so I started to think about building my own log store to cure my own wood.
I wrote a separate guide about keeping warm in winter without power if you don't have a fire so that could also be useful information for you.
I'm fortunate in that I've been storing wood out in the garden for a few years already. I also have access to some friends with trees but even if I didn't have these advantages, I'd still fancy my chances out in a woodland somewhere collecting wood for an emergency.
And, I should say here that these advantages are not things that simply fell out of the sky and landed in my lap. I used my imagination and intention to make them happen. That's a really important point because too often we get caught up in the excuses rather than the actions and that kind of thinking really hinders you.
That being said, when I eventually settled on my DIY log store design, I found myself asking: why on earth didn't I think of it sooner?!
In this guide, I'll show you exactly how I built my DIY log store and planter and hopefully, you can take what you need from it and apply it to improve your own self reliance skills.
I will say at the outset, my design ended up being way more expensive that I intended at £145 because I didn't give myself enough time to collect enough pallet wood for the build. So, if you want to save yourself a lot of money (about £100 worth), use pallets for the side and floor rails.
Anyway, enjoy!
What Is A Log Store?
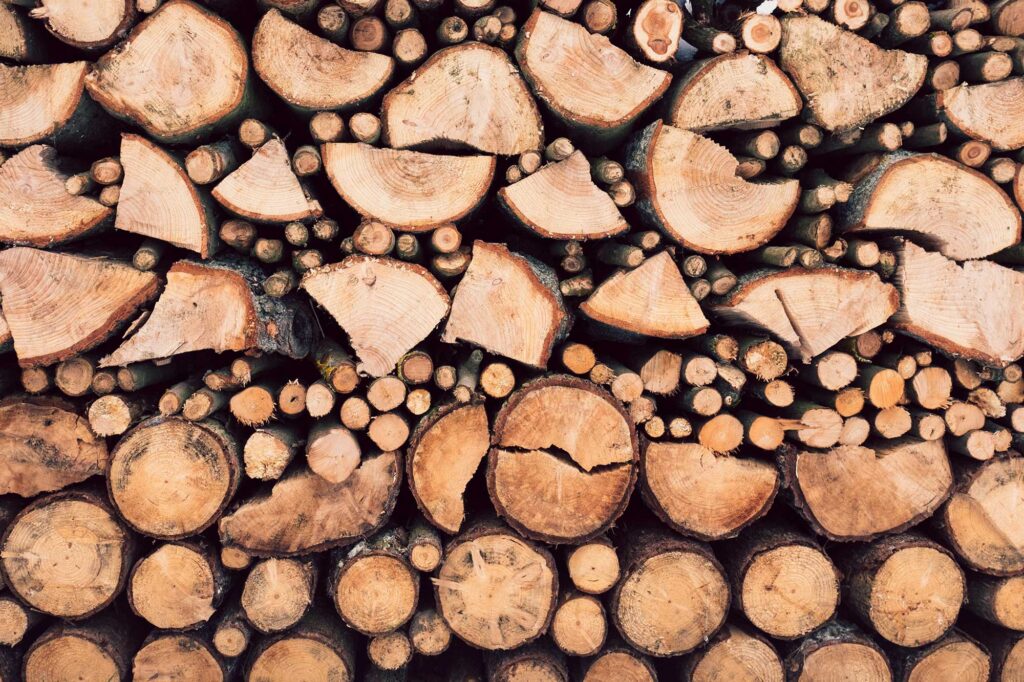
You won't be surprised to learn that as the name suggests, a log store is a shed-like structure for storing logs. It is designed to prevent rain from falling directly onto logs whilst allowing for maximum airflow to help dry them out (cure them) ready for burning as fuel.
Log stores can be as big or small as you need depending on your situation and I'll go into how to work out how much wood you might need later on.
Typically though, a log store is basically a pile of logs under some kind of cover.
How Does A Log Store Work?
If you want to heat your home with firewood efficiently, you need properly cured wood. Not only does cured wood burn cleaner; it also burns hotter – and this makes the heating more efficient.
Good log stores work by capturing as much heat as they can in the storage area whilst allowing air to flow freely throughout. If you're in a warmer climate, you may be better served by leaving your wood out in the open to dry in the sun and wind.
This is a very efficient method to dry wood as long as you cut it and stack it correctly. I'll go into that a bit later.
Unfortunately for me though, I'm in the UK and our climate is a temperate maritime climate and we sometimes get a lot of rain – even in summer – so that is why I prefer to cure my wood under cover.
If your diy log store is curing wood properly, it will season your firewood within a year and will reduce the moisture content to less than 20%.
Properly cured wood with a moisture content of less than 20% is beautiful to burn. It doesn't smoke, it doesn't smell, it doesn't block up your chimney with creosote and it burns hotter and longer.
I've added a whole section below about checking moisture content in wood because it is such a simple yet essential step to improving the efficiency of your wood burning.
What Size Log Store Do You Need?
Ideally, you need a log store big enough to hold all of the wood you're going to burn in a single winter.
This amount will change depending on the size of your home and how well it retains heat. You can of course improve this by simply insulating your home better. I would advise you do this before switching to wood heating anyway; because it just makes sense.
For most of us here in the UK though space is a premium, and it's not possible for us to store all of the wood we need for a full winter so, as with most things in life, you do what you can with what you've got.
The diy log store I built in this guide is 2m long x 1.2m deep x 1.2m high. 2.88 cubic metres (or approximately 85 cubic feet).
In practice, this volume of wood will only last me 4 or 5 weeks if I used it every day. That's why efficiency, insulation and warm clothing are also part of the plan.
Whilst my long term goal is to be fully self-sufficient by 2025; for now I will make do with having enough to get me through a short emergency in the winter.
It does pay to know how much wood you'll need to heat your home though.
How Much Wood Do You Need To Heat Your Home
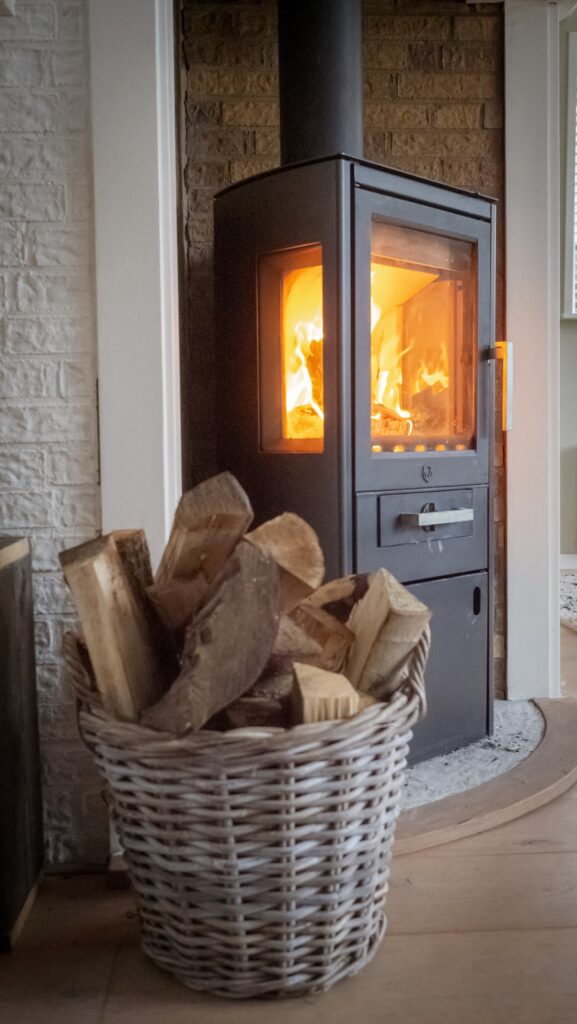
The most annoying answer you can ever get to any question is “it depends”. Unfortunately, it is actually true in this case because how often you burn, how big your home is, how efficient your burner is, how well insulated your home is and how cold it gets outside are all factors.
There are some heavy calculations about to try and help you work out how much you need to burn to keep your home warm.
The short summary though (and only to be used as a rough guide) is that for a house with a 100 sq metre footprint and two stories with a wood burning stove as your only source of heat; you're going to need at least 6 cords of wood.
What Is A Cord Of Wood?
A cord of wood is 128 cubic feet of wood. It comes from a time when the sale of wood was measured with yarn; firstly by measuring the length of the wood pile, then the height, then the depth. It was done this way because one wood cutter's ‘pile of logs', was not always equal to another wood cutter's ‘pile of logs'.
A cord of wood is usually stacked 4 feet x 4 feet x 8 feet to give you a 128 cubic feet of wood. Of course, you could stack it any other way to make up 128 cubic feet of wood but the 4 x 4 x 8 is the most common.
With all of that pre-amble out of the way, let's get into building your own DIY log store & planter.
How To Build A DIY Log Store And Planter
This is a simple to follow guide to building your own diy log store with a planter on top. I'm not a carpenter or joiner. but I am quite happy to give stuff a go and in the end, this one turned out OK so feel free to take from it what you need.
My log store is 2m long, 1m deep and 1.2m high. It is capable of storing 85 cubic feet of wood – about 2/3s of a cord of wood.
The instructions below are for my log store. Adjust to suit your own design.
DIY Log Store Tools List
- Hammer
- Saw (power tool preferred but not necessary)
- Drill (electric if possible) with 10mm wood bit (or 10mm hand augur)
- 5m tape measure
- Pencil
- Spirit level
- Staple gun
- 2 x 4″ G clamps
DIY Log Store Materials List
- 3 x (L)4800mm x (W)75mm x (T)75mm x treated timber posts
- 43 treated rough sawn timber (L)2.4m x (W)38mm x (T)19mm
- 4 x rough sawn timber (L)2.4m x (W)100mm x (T)25mm
- 1 x sheet of structural hardwood plywood 2440mm x 1220mm x 9mm
- 16 x 180mm M10 threaded coach bolt with nuts
- 4 x heavy duty angle brackets 60 X 50mm
- 1 x box of 35mm wood screws
- 1 x box of 50mm joiner's nails
- 1 x box of 40mm panel pins
Note: It was always my intention to use reclaimed pallet wood (that I collected for free) for the sides and back of the store but circumstances had me need to build this quicker than I was expecting and I didn't have the time (a few weeks at least) to collect the pallets.
Using pallet wood for the back and sides would reduce your build cost significantly so make sure you give yourself plenty of time to gather materials if you want to save money.
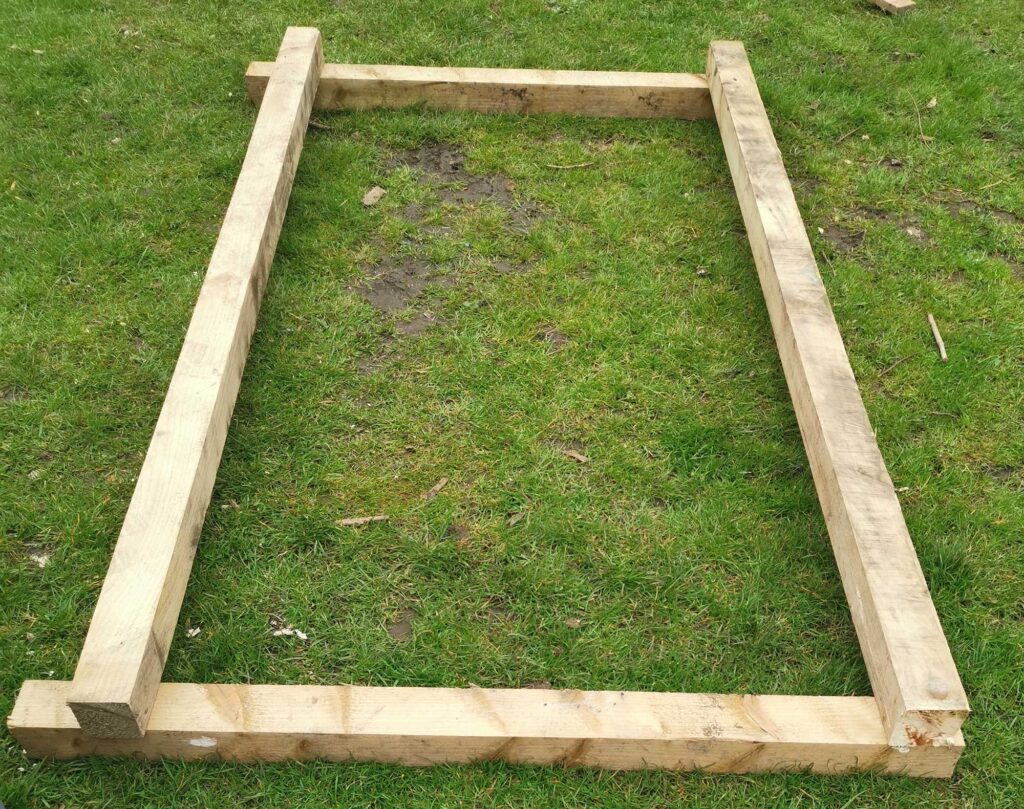
How To Build The Log Store Frame
The frame is higher at the rear than at the front to give a 200mm front fall on the log store roof.
- Cut the 75mm x 75mm posts to size. You will need 4 x 2000mm lengths, 2 x 1300mm, 2 x 1100mm.
- Lay the frame out on the floor and place the two 1100mm lengths at the sides (front frame).
- Lay the 2 x 2000mm lengths across the 1100mm sides.
- Position the 2000mm lengths as follows:
- 20mm from the top
- 100mm from the bottom.
- (It should look like the picture above.)
- Use your spirit level to make sure the 2000mm lengths are square.
- Mark the position the 2000mm lengths are at on the 1100mm lengths with a line (this will help you keep things lined up for the next step).
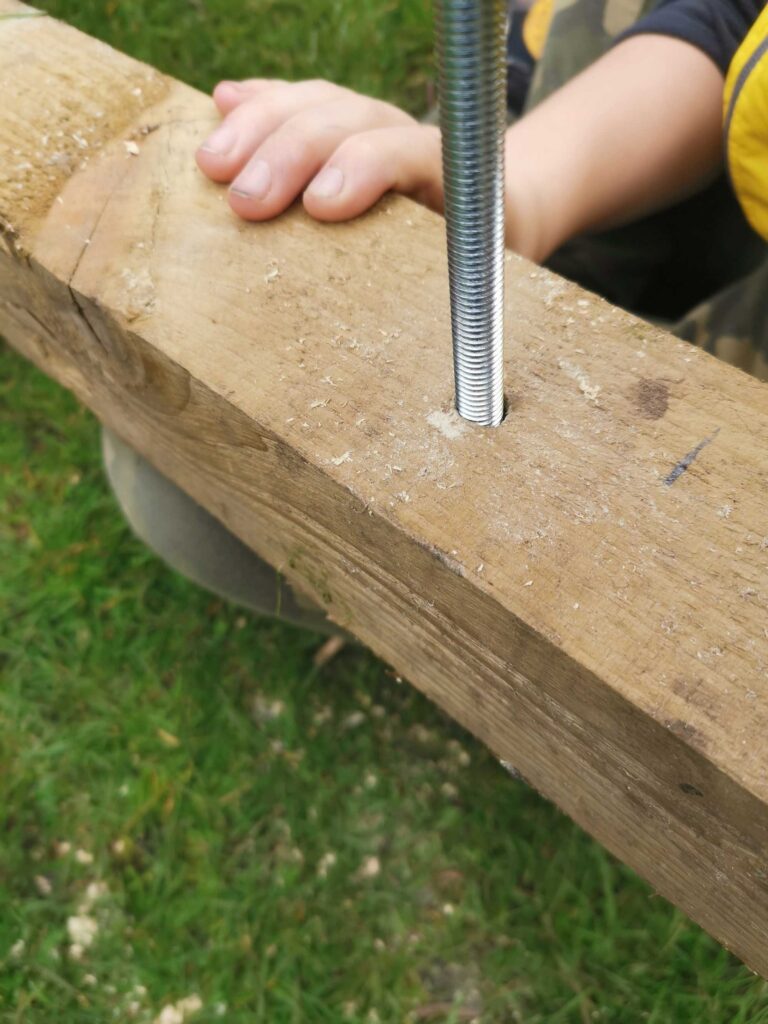
- Drill 2 10mm holes through each end of both 2000mm lengths where they are going to be bolted together as shown in the picture below (I actually only used one bolt for each but 2 would have been better practice I think)

- Once all the holes are drilled (you should have at least 4 holes), you can fit the bolts.
- Fit the bolts with the head on the front side (the visible side) and tighten the nut to the rear side.
- Repeat the process for the rear frame.
- Place the two 1300mm sides down first and then place the 2000mm lengths across with the top length 20mm from the top and the bottom length 100mm from the bottom.
- Bolt as required.
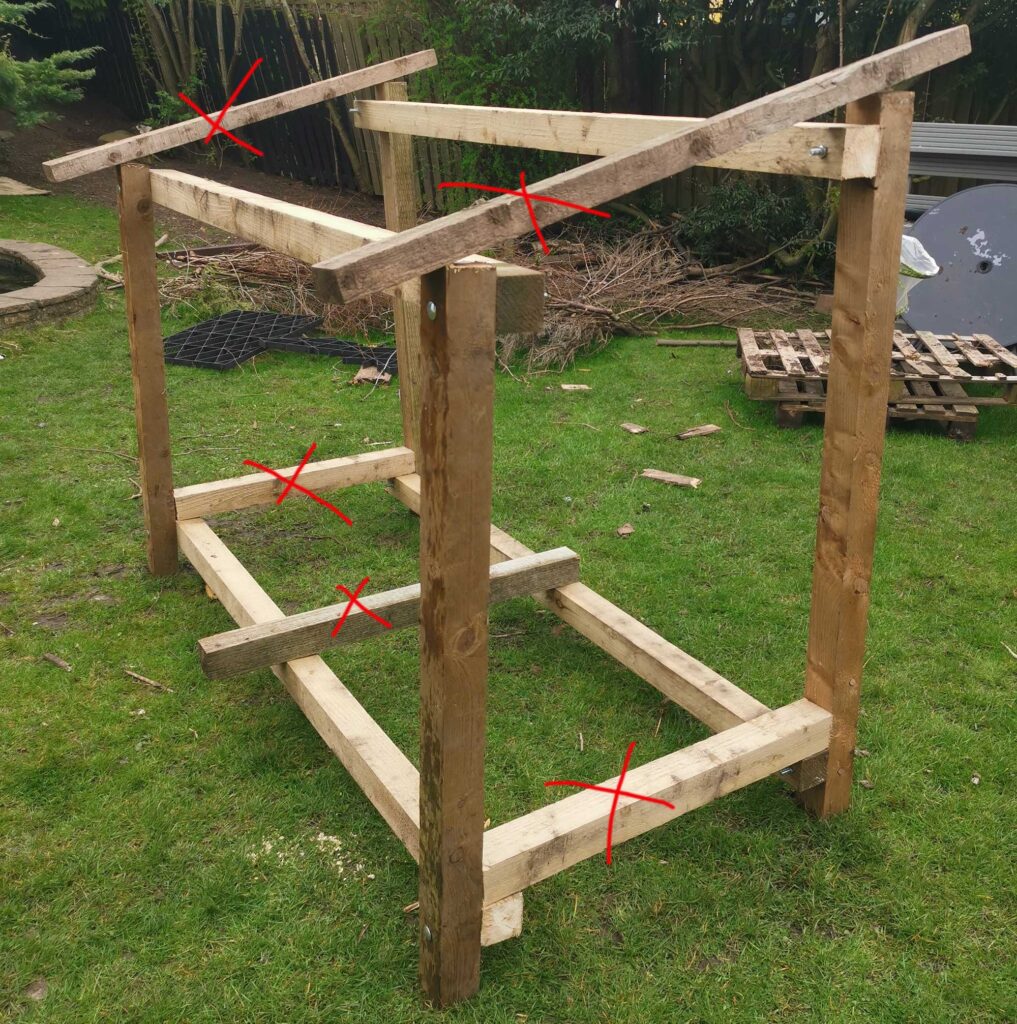
I took a picture of my frames before I fastened them together. In the pic, there are lengths of wood marked with ‘X', these are not fastened in any way, they are just being used to weigh the frame down so I could get an idea on the size.
Your front and rear frames should look like this (albeit not fastened together yet):
Fasten The Frame Together With Slats
At this point, you will have two separate front and rear frames.
I fastened them together with the 38mm slats, nailing them to the left side first, then the back, then finally the right side.
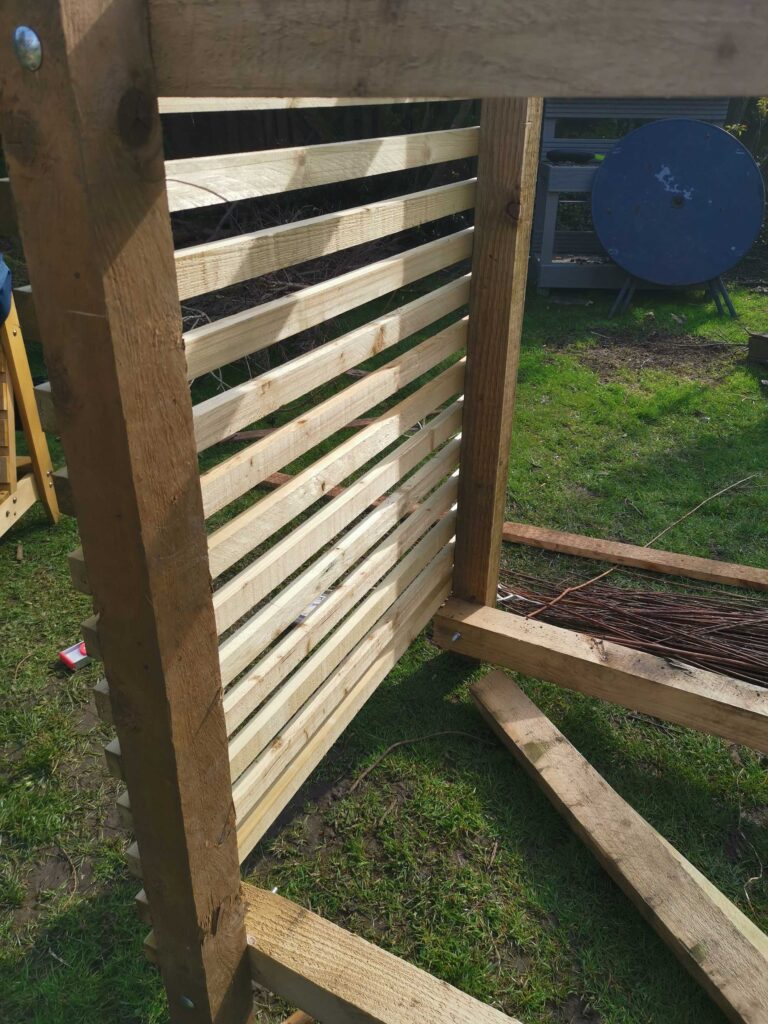
I used one of the slats as a spacer between fastenings, giving an even spacing all the way up. So, for example, I nailed the bottom slat on first, making sure it was square with my spirit level, then placed a slat on top of it.
I then got another slat and placed that on top of the spacing slat and nailed that in place, again making sure it was flush at both ends to the frame and square.
After nailing the first one on at the bottom, I nailed another one to the top of the side temporarily to keep the distance between the front and rear frame correct.
How To Add Slats To The Frame:
- Cut the 2400mm slats to size:
- You will need 14 x 1000mm lengths for each side (28)
- 16 x 2000mm lengths for the back.
- 26 x 1000mm lengths for floor (in my case, I used whatever pallets I'd collected and some extra spare wood to make the floor).
- Have someone give you assistance to hold the frames as you first position and then nail the first slat to the bottom, two nails at each end, just above the 2000mm cross lengths. Make sure you use your spirit level here to get the slat square.
- Place another slat directly on top of the fixed slat. This is your spacer.
- Place a 3rd slat on top of the spacing slat, use your spirit level to square it up, making sure the ends are flush with the outermost edges of the front and rear frames. Nail the 3rd slat in with two nails at each end.
- Remove the spacing slat and place it directly on top of what was the 3rd slat but is now the 2nd.
- Temporarily fix a slat to the very top of the sides (making sure to keep it square) with each end flush to the outermost edges of the front and rear frames. This will keep your frame square as you add the slats from the bottom up.
- Repeat the process from the bottom up all the way to the top, at which point you may need to remove your temporarily fixed slat and reposition it according to the spacer.
Do the same thing for the 2000m rear lengths, followed finally by the third and final side.
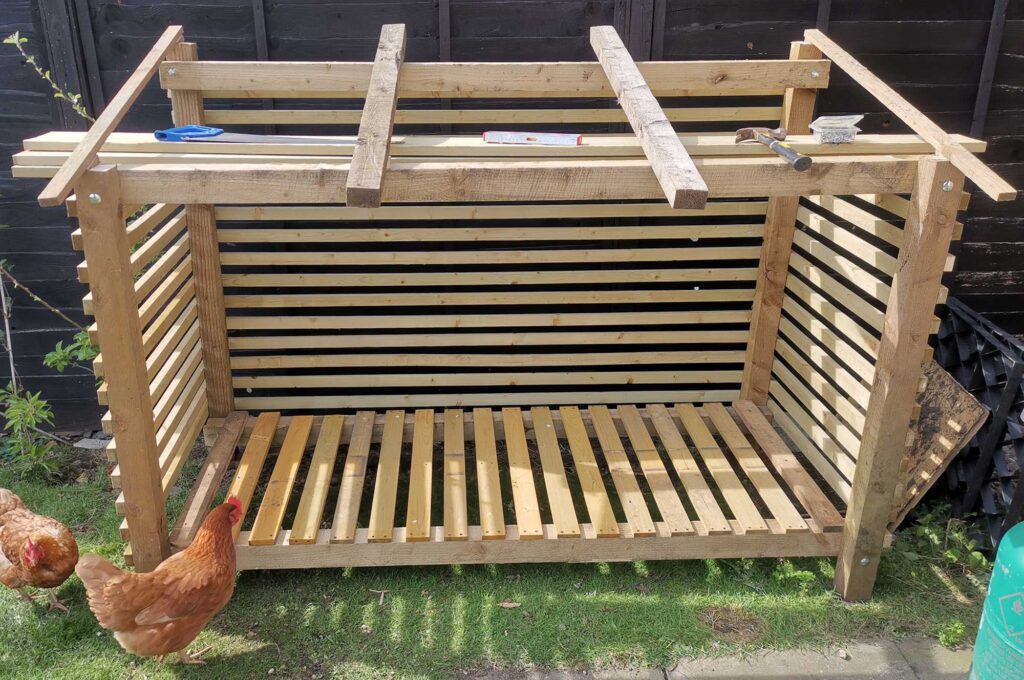
Repeat again for the floor. Once complete, you should have something that looks like this (without the 4 pieces on the top).
How To Build The DIY Log Store Roof
The roof was probably the hardest part for me because it took me a little while to figure out. As I said before, I'm no joiner so it took a few goes to get something I was happy with that was level.
The basic premise was to lay 4 slats from the higher rear frame to the lower front frame as shown in the image above and then lay exterior plywood on top.
You'll notice the two ‘slats' in the centre are thicker than the end ones. This is because the two end slats rest on the upstands of the posts and the two central ones rest on the cross lengths. The cross lengths are 20mm lower than the height of the posts.
The fix using the materials list in this guide is to use 1 slat for each of the ends and then 2 slats (doubling up their height) in the two central ridges. You will use a total of 6 slats.
Method:
- Cut 6 lengths of 38mm slat to 1200mm in length.
- Mark the location where the centre ridges will go:
- Measure 667mm from the left edge on the rear cross length and make a mark.
- Measure 667mm from the left edge of the front cross length and make a mark.
- Measure 667mm from the mark you've just drawn on the front and rear cross lengths.
- Screw two of your 1200mm length slats together to double their height.
- Do this again to create 2 x double height slats for the central ridges.
- Lay the single slats on either end, making sure they are flush to the rear post but overhang the front of the log store by about 200mm.
- Lay the double-height slats on the marks you just drew, again making sure the rear is flush and the front overhangs by 200mm.
Creating Wedges For Support:
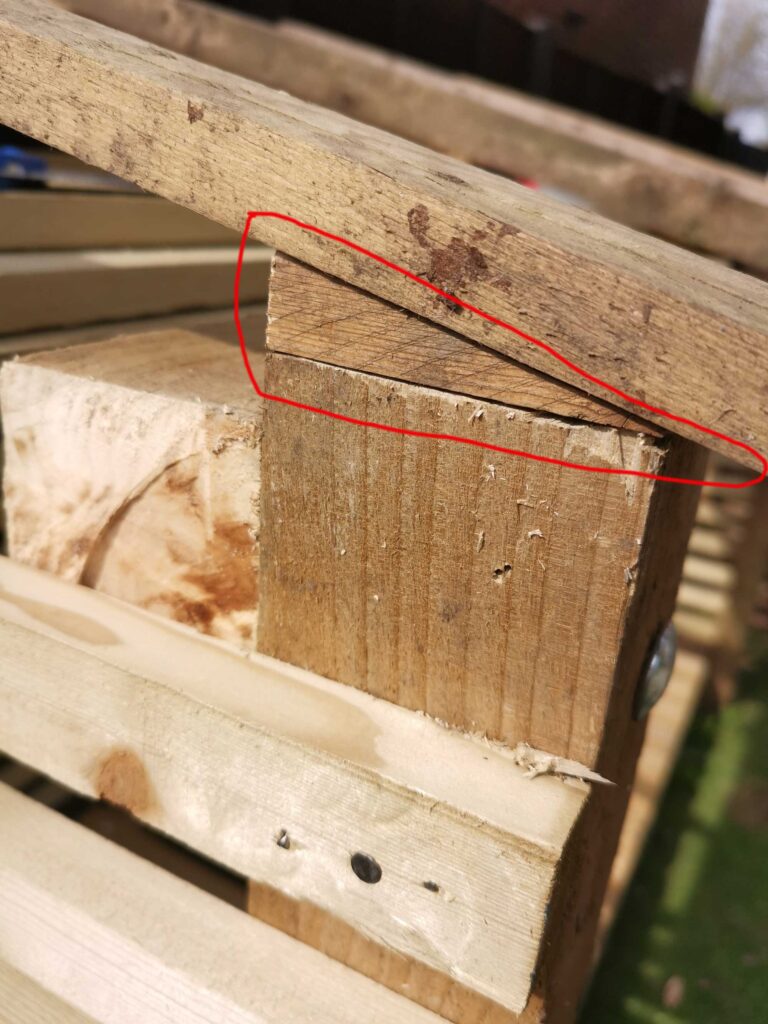
You will notice as you lay the slats down the store from rear to top that there is a triangular shaped gap between the slat and the posts and cross lengths.
You'll need to create some wedges to support the slats.
- With your edge slat flush to the edge (so the sides all line up), take one of your offcuts of wood and hold it up flush against the edge, covering the ‘gap' between the slat and the post top. You want to hold it up in the same orientation as the slat because this will give you a single cut to create the wedge.
- Use a pencil to draw (from the opposite side to where you are holding up the offcut) the triangular gap onto the offcut.
- Remove the offcut. You should see you have drawn at least 1 line to form triangle.
- Cut this line to create your wedge.
- Trace this wedge on the remainder of the offcut and cut out another 7 wedges.
- Place all of these wedges beneath all of the slats across the top like shown in the picture above.
- Using your 50mm nails, fasted the slat and wedges to the side posts and cross lengths.
Adding The Plywood Roof To The DIY Log Store
Thankfully, this part is pretty easy!
Simply cut the the plywood sheet to 2000mm x 1200mm. My makita jigsaw makes this easy work but it is possible with a hand saw – it just takes longer.
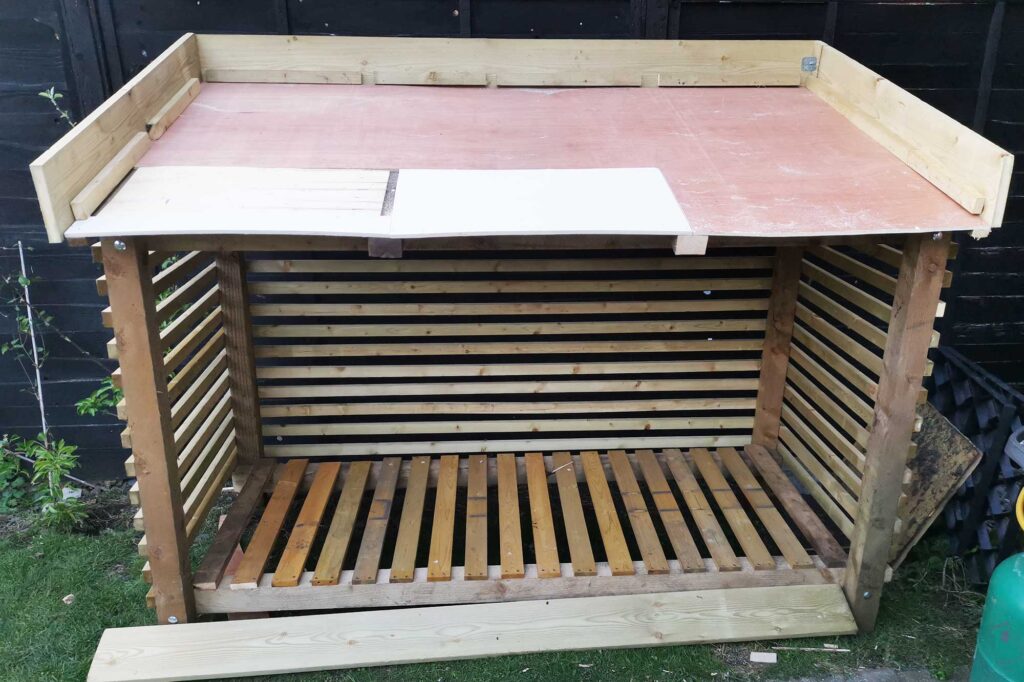
Once the sheet is cut to size, place it over the roof. It should fit perfectly across the top. Screw into place with the 35mm wood screws screwed into the ridge slats.
I used up wood scraps for my log store which is why my roof is patchy. You won't have your planter sides on yet like I have on this image below.
Add A Vegetable Planter To The Log Store Roof
The premise here was to create a simple ‘raised bed' and have it resting on top of the log store.
The challenge was that the roof was at a pitch, so the raised bed had to be ‘wonky'. It was pretty easy to get the correct pitch though.
I used corner brackets to fasten all 4 sides of the planter together and wood offcuts as ‘runners' or rails to hold the planter sides in place.
How To Create The Planter
- Cut 2 lengths of 100mm sawn timber wood to 2048mm (the extra 48mm is to stretch the length of the roof + the planter sides).
- Get some help to have someone hold up the rear planter side for you. Make sure it's flush to the side posts and level from side to side. It should be about 35mm below the line of the plywood roof. I used temporary wood pins to pin the side into place so that I could:
- Mark a line on the inside across the back panel at the level of the roof. This is where I am going to fix the runner to make sure the panel stays at the correct height and rests on the roof.
- Mark the pitch of the roof on a piece of 100mm cut off wood. I'll use this as a template to create the planter sides.
- Using one of the uncut 100mm timbers, hold it up against the side of the planter, angling down, as if it were going to be the side.
- Slide the wood back up until it covers the rear planter completely.
- From the inside, mark a line up the offcut at the angle of the rear planter panel. It should be going straight up.
- Now make a mark at the front end of the side panel, at the point where the front planter panel is going to be. It should be 1200mm from the line you just drew.
- Remove the uncut timber side panel and cut the rear angle you've just drawn off. It should have an angle like the picture below:
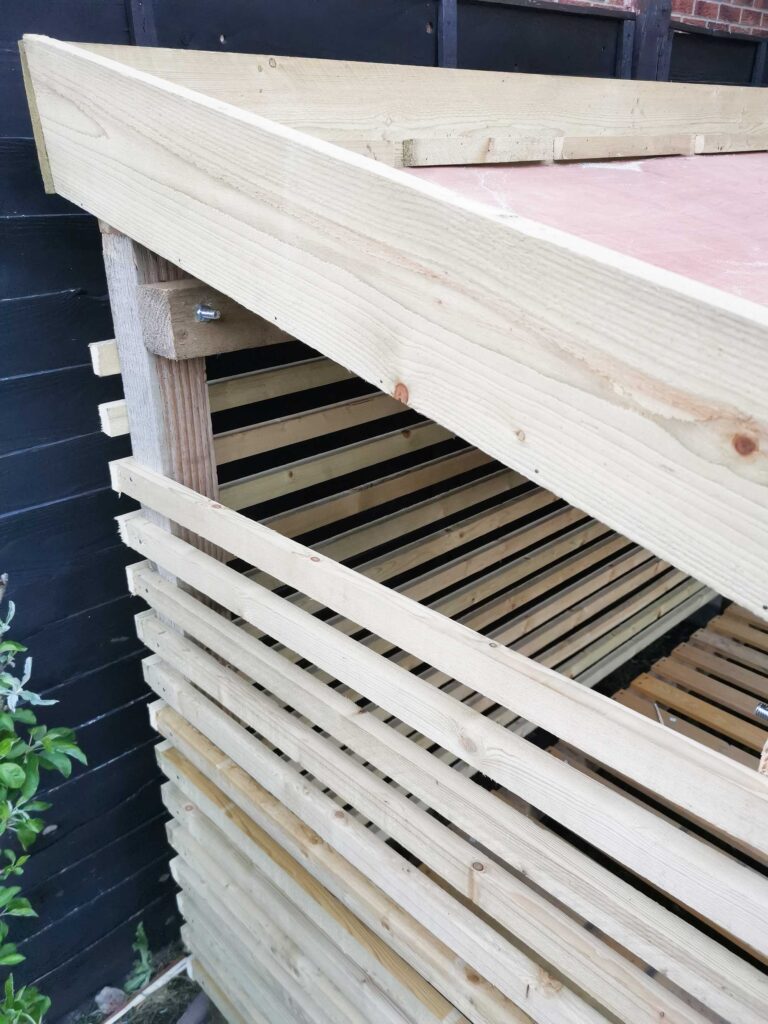
- Using the offcut, position it on the mark you made for the front of the panel and draw a line up, making sure the offcut straight edge is flush with the timber straight edge and that the line is sloping the correct way (it should be sloping the same direction as the rear cut).
- Cut the panel and hold up at the side of the planter. If all looks good and aligned, trace the cuts onto your final 100mm timber panel and duplicate the side.
Adding Corner Brackets And Runners
Using the temporary panel pins, now you're going to pin the sides up so that you can add corner brackets to the structure and make it solid.
- Add a railing or runner to your rear panel where you marked the line.
- Pin up the rear planter panel with temporary panel pins, making sure that the runner is resting on the log store roof.
- Hold your left side panel up to the rear panel in position, making sure it is correctly aligned with where the bottom of the planter is going to be too. Mark a line on the interior side where the runner is going to go.
- Remove the side panel and fix the runner.
- Return the side panel to its position on the planter and temporarily pin it into place using the panel pins.
- Duplicate this process for the right side planter panel.
You should now have something like this:
Now you can fix in the sides to the rear with the permanent corner brackets.
Simply screw the corner brackets to the sides and rear panels, making sure to leave enough clearance for the runners. Use as many screws as the bracket will take.
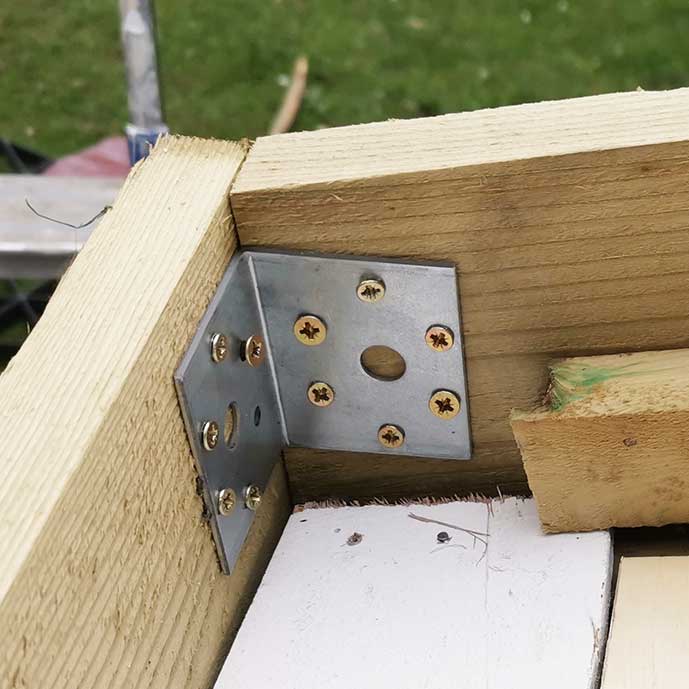
Once both sides are fixed firmly to the rear panel and all runners are in position, you can fit the front planter panel.
Fitting The Front Planter Panel
With your final piece of 100mm timber (should already be cut to 2048mm in length), you can fit the front panel to the planter.
- Get some help to hold the front panel in position and temporarily fix it using the panel pins to the ridge slats.
- With your friend assisting you to keep the panel in place, begin to fix the corner brackets, making sure to use as many screws as the bracket will take.
- Do this for both sides.
- Once both sides are bracketed up, you can mark a line on the interior side of the panel for your runners to take some of the weight off the sides.
- After you've marked your runner line, fit your runner with some of the 38mm offcuts with screws.
Add Your Protective Planter Liner
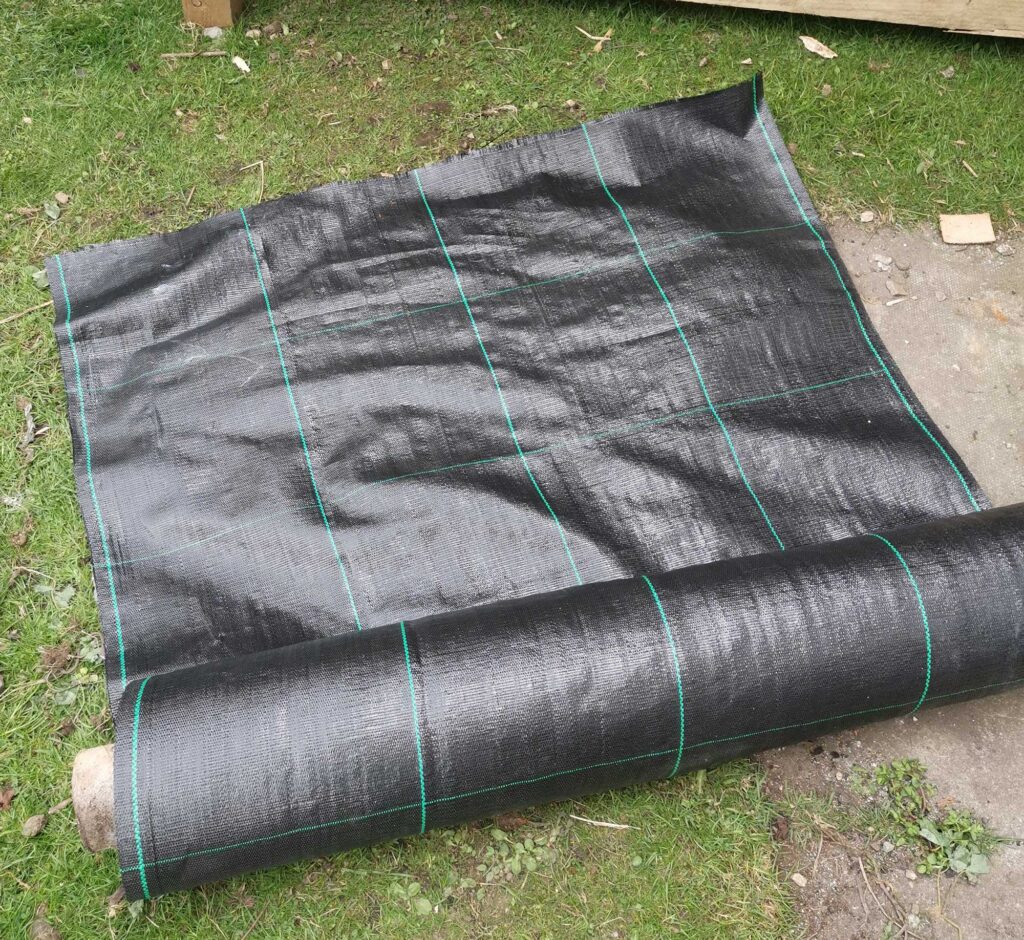
As an extra layer of protection for the plywood roof, you should add a liner to the bottom and sides of the planter.
Staple the liner onto the panels and plywood roof to keep it in place.
I had some drainable weed fabric lying around so I chose to use that but you may want to choose a none-drainable liner to prevent any water from running onto your roof.
You will need to add one drainage hole in one of the front corners though as you don't really want waterlogged planter.
In my case, I plan to let the water run off to the bottom and then drain from one corner into a rainwater harvesting barrel.
Once complete, you should have something like this:

With your DIY log store planter all ready to go, all you need to do is find some good soil/compost and start filling it up.
I plan to use mine to grow a selection of medicinal and culinary herbs.
Oh! And let's not forget we can now start filling our log store up with wood!
How To Cure Wood In Your Log Store Properly
Before you rack wood, you need to cut it and split it to the right size for your stove.
Once cut and split, you can safely rack it away in your log store, making sure to leave a gap between multiple rows.
You want maximum airflow at all times.
The main thing you are shooting for by racking wood correctly is to reduce moisture content.
Firewood that has too much moisture in it will cause you a lot of problems, not least of which is this list taken from woodheat.org:
- Difficulty getting a fire going and keeping it burning well,
- Smoky fires with little flame
- Dirty glass.
- Rapid creosote build-up in the chimney.
- Low heat output.
- The smell of smoke in the house.
- Short burn times.
- Excessive fuel consumption.
- Blue-gray smoke from the chimney.
How Long Does Wood Need To Cure?
Typically, in a stack with good airflow, it can take about a year to season properly. Properly seasoned wood is wood with a moisture content of less than 20%.
Therefore, as well as stacking and storing your wood correctly, you should also keep a close check on moisture content before you burn any of it.
How To Measure Wood Moisture Content
The easy way (and the way I do it) is to use a wood moisture meter. You can pick one up for less than £20 online. The added benefit to a moisture meter is that they don't just measure moisture in wood, but moisture in anything – plasterboard, brickwork etc.
Traditionally though, you could measure the moisture content of wood by weighing a single piece of it, then placing it in an oven for 24 hours. If the weight dropped, your wood needed more drying, if it didn't change, it's completely dry and ready to burn.
If you want a more thorough explanation of how to check wood moisture content without a meter, HouseGrail will talk you through it in great detail.
Have You Built Your Own DIY Log Store?
If you've got a design of your own that you'd like to share with the bournebright community, I'd love to see it. Tell us about it in the comments below.
If you haven't done so already, and you're interested in learning more about self sufficiency and living a more meaningful life, please come and join our self sufficient online community, where we share our individual journeys towards self sufficiency and strive towards leading a more wholesome life.
Beat The Reset
If you enjoyed this guide, subscribe to my newsletter to receive more content like this, lots of positive news stories and some practical solutions to help you beat the reset.