
Food preservation has been the linchpin of human society for 1000s of years. In fact, there is no greater skill the self sufficient homesteader can learn that will save as much money as the lost art of food preservation.
The convenience of household freezers and supermarkets in every village has left many of us living in a state of false security.
We somehow foolishly believe that as long as the electricity stays on and the trucks keep trucking in, we’ll never need to worry about growing our own food or preserving the food we grow in accordance with the natural cycles of the seasons.
But what if the electricity goes off? Or the trucks stop trucking in? How would you cope then?
Curious, I asked this very question on Twitter to find out what real people would actually do in that kind of situation.
As you can see, the answers varied from raiding the local supermarket to cracking open emergency supplies of dried food – neither of which seem like long-term solutions.
But, if you knew about growing your own food and food preservation, you’d never need to participate in a live action casting call for The Walking Dead or break into your emergency supplies without hope of ever replenishing them ever again.
Food preservation is an ancient art and it's fair to say that if your ancestors knew you had no idea how to do it, they would probably give you the most well-deserved scolding you've ever had in your life.
I don't know about you but I don't really want to upset my ancestors; so I raided second hand book stores, car boot fayres and charity shops to find all the old food preservation knowledge I could get my hands on to share with you in this guide.
(and maybe save you from the wrath of your ancestors too)
Enjoy!

9 methods of food preservation you really need to know
The most common methods of food preservation you find in the ancient cultures are drying, smoking, salting and burying.
These methods are not too dissimilar from the methods we use today, although modern society seems to have hidden the simplicity of them behind a veil of consumer appliances or labelled them as hazardous to health.
And how is it that all of these ancient societies knew how to preserve food in very similar ways anyway? A question for another day, perhaps…
It may not come as a surprise to you then that despite the advances in modern technology, the fundamental aspects of food preservation remain the same as what they did thousands of years ago.
I should point out here that I'm not ranking these methods in any particular order suffice to say that my least favourite methods are those that require electricity or proprietary technology to function.
Freeze drying is a perfect example of that but it's worth mentioning because it is a very powerful method of food preservation. And if you have the means and space to try it and the moral cost of using it does not bother you; why not?
#9. Making Jam

Did you know that as long as jam is canned properly, it will store for years at room temperature?
How Does Jam Last So Long?
Preservation in jam relies on two key components: sugar, which acts as a natural preservative by inhibiting microbial growth, and pectin, a substance that induces a gel-like consistency. This combination of sugar and pectin enables jam to maintain its freshness over extended periods.
The natural sugars in jam prevent bacteria from growing.
There are some fruits that do not contain as much pectin as other fruits (like strawberries, peaches, cherries, and rhubarb) and for these, you need to add in pectin or add in fruits rich with pectin to complement the recipe (like apples, plums, lemon or grapefruit).
We wrote a guide about making jam without pectin that contains some time-tested jam recipes for you to try this summer.
After you've made your jam, you can bottle it or ‘can it' by using the simple water bath canning method to sterilise the contents and ensure it stays fresh for years.
#8. Freeze Drying
Freeze drying is definitely a product of our modern environment. I'm not so sure our ancestors would approve. Freeze drying is energy intensive and it requires the manufacture of a freeze drying machine.
However, it is exceptionally good at drying most foods whilst keeping the nutrients intact.
According to Harvest Right, manufacturer of one of the most popular freeze dryers available for home use, freeze drying is the process by which food is frozen to 40 degrees below 0.
Once frozen, a vacuum pump then creates a powerful vacuum around the food. As the trays gradually warm, and while the food is still frozen, a process called sublimation occurs which removes water from the food (basically, it goes straight from ice to vapour missing out the liquid phase).
This is what allows the food to keep its original shape, flavour and nutrition.
The process takes between 20 to 36 hours.
Freeze dried food will last for up to 25 years which is why, despite its heavy manufacturing cost, it remains one of the most popular methods of food preservation amongst those looking to preserve and store food for the long term.
#7. Freezing

After reading about freeze drying, freezing seems a little underwhelming. It is more accessible to most people though as almost everyone has a freezer at home. But there are some words of caution.
Freezing can preserve food with most of its nutrients frozen in place.
How Does Freezing Preserve Food?
Most chemical and biological processes run slower at lower temperatures; which means that if you cool food a lot, enzymes, bacteria and fungi in the food get too cold to decompose the food.
That's why food lasts longer in the freezer than in the fridge and longer in the fridge than on the counter.
Freezing food for preservation is not a new idea.
Cultures like Vikings and others in extreme northern climates did it by default for thousands of years. It was a perfectly safe method of food preservation.
It’s only when we started using freezers in our homes or commercially in hot climates that things started to get messy.
That’s because artificially creating colder temperatures in hot climates (in our homes) leads to a ‘slow freeze’. That is, things get frozen slower.
Why Does My Frozen Food Look Like Mush?
When things freeze slowly, ice crystals begin to form and expand and stack up into big ice crystals. These big ice crystals poke holes through the walls of the cells of the food and when the food thaws (defrosts) the food leaks out and you get that commonly spotted freezer mush. Yuck.
The trick to a good freeze, as shown to us through the practices of the ancient cultures, is a quick freeze.

The teaching comes to us from the story of the Inuit man who was showing the white man how to fish in minus 40-degree windy conditions. As soon as he caught the fish and lifted it out into the air, it froze almost immediately.
After eating it weeks later, the white man realised that it was tastier because the fish had frozen almost instantly, forming only small ice crystals that didn't damage the cells of the food and retained all the flavour.
So, if you’re thinking of preserving your food by freezing it, you might want to buy yourself the most powerful, quick-freezing freezer you can get your hands on for a better preservation.
We wrote a more in-depth guide about how to properly freeze your food for long term storage over here.
#6. Drying (or dehydrating)
We mentioned the Inuit earlier who live in such a cold place that they practically live in a freezer, making food preservation easy. But what about everyone else? How do they go about preserving their food naturally?
Warmer weather makes it hard to keep food fresh for very long. Luckily, nature, as it always does, provides the answer – in the sun.
The sun provides the perfect solution for food preservation for those living in warmer climates because the ancient peoples discovered that if they laid their harvest out in the sun's hot rays, it would dry; which meant their food stayed edible for much longer.
This is because drying food removes the water through evaporation which means that bacteria and mould can't grow because both need moisture to live on.
Removing moisture and drying the food you grow is one of the oldest known ways of preserving food.
This is great if you live in a hot climate, where you can harness the natural and free energy of the sun to dry your food. But what if, like me, you live in the UK where it’s not so hot?
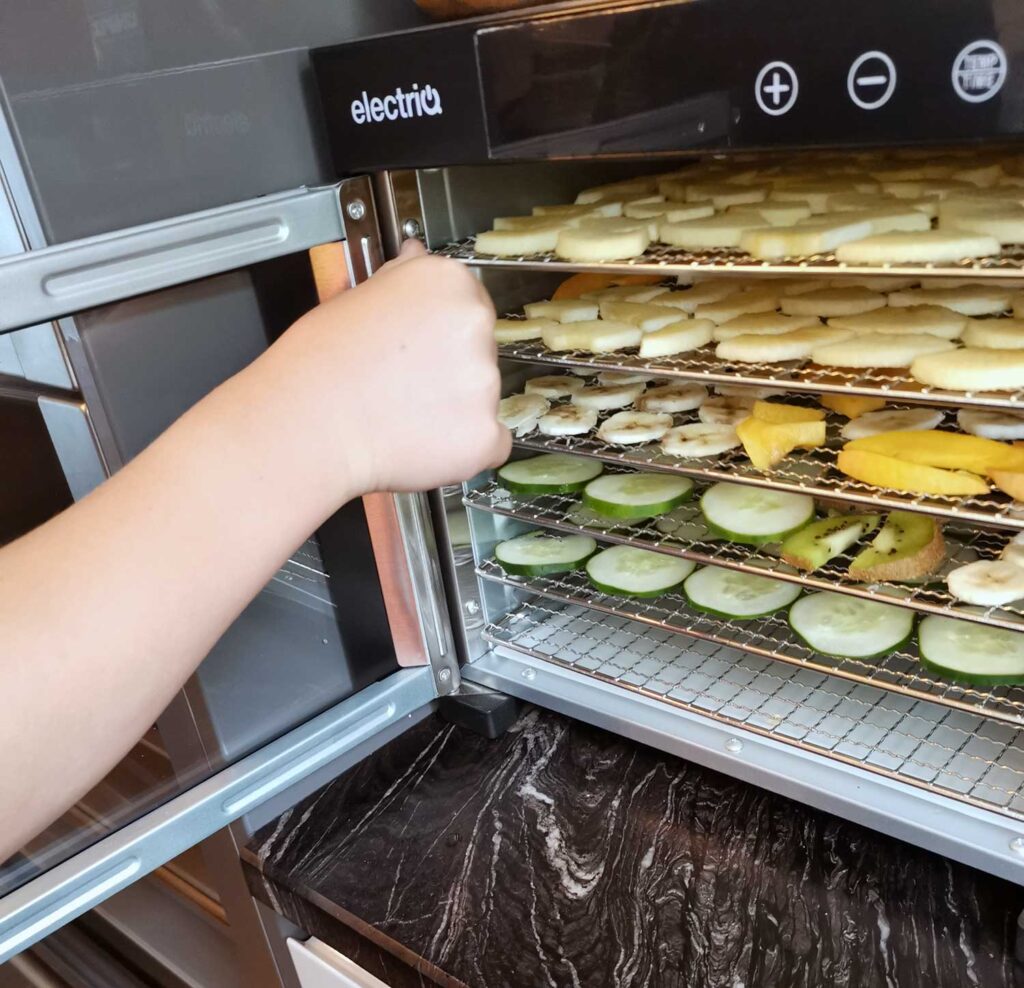
You can mimic the sun’s drying rays by using a food dehydrator. You can dry almost anything with a food dehydrator, and we wrote a comprehensive guide to food dehydration over here.
Of course, there is the energy cost and manufacturing cost to consider, but when you weigh that up against the rising cost of food in most of the world, food dehydration begins to make more commercial sense.
I cover it in greater depth in the guide, but with food dehydration, you can preserve fruit, vegetables and meat and you can control the temperature and time for maximum taste, flavour and texture.
Properly dehydrated food will last at least 12 months in sealed containers.

#5. Salting
Salt has been used as the primary method of preserving meats and various other foods for as far back as history records. We see it crop up time and time again in Egyptian, Indian and Viking culture – and almost all other ‘pre-refrigeration’ societies.
Salt has a preservative effect thanks to the osmotic pressure it creates through absorption. The salt draws moisture from the item being preserved through the process of osmosis.
Salt is mostly used for preserving meat because it leaves a salty taste that would spoil the taste of fruits and vegetables.
The process for salt preserving meat (dry curing) is simple and straight forward; though there are several variations on the basic method used to improve flavour (like adding pepper or other spices).
Generally, though, you simply rinse the fresh meat in cold or lukewarm water then pour a thin layer of salt (rock salt is the best) all over the meat. It’s important to use lean cuts of meat for salt curing because the salt cannot penetrate the fat layer and fat can go rancid.
Next, hang or set the meat out in a cool environment (up to 60 degrees Fahrenheit) that's not below freezing for a couple of weeks to dry out.
When the meat has lost about 30% of its pre-salted weight, it is cured and ready to eat or smoke.
Salt-cured meat will last for months if kept in a cool, dry place.

#4. Smoking
Native Indian tribes mastered the art of smoking as a method of food preservation thousands of years ago. Smoking was used to preserve meat or fish for months and, sometimes, years.
Without refrigeration these food sources would spoil so smoking was an essential way to preserve food and contributed greatly to the survival of the native tribes.
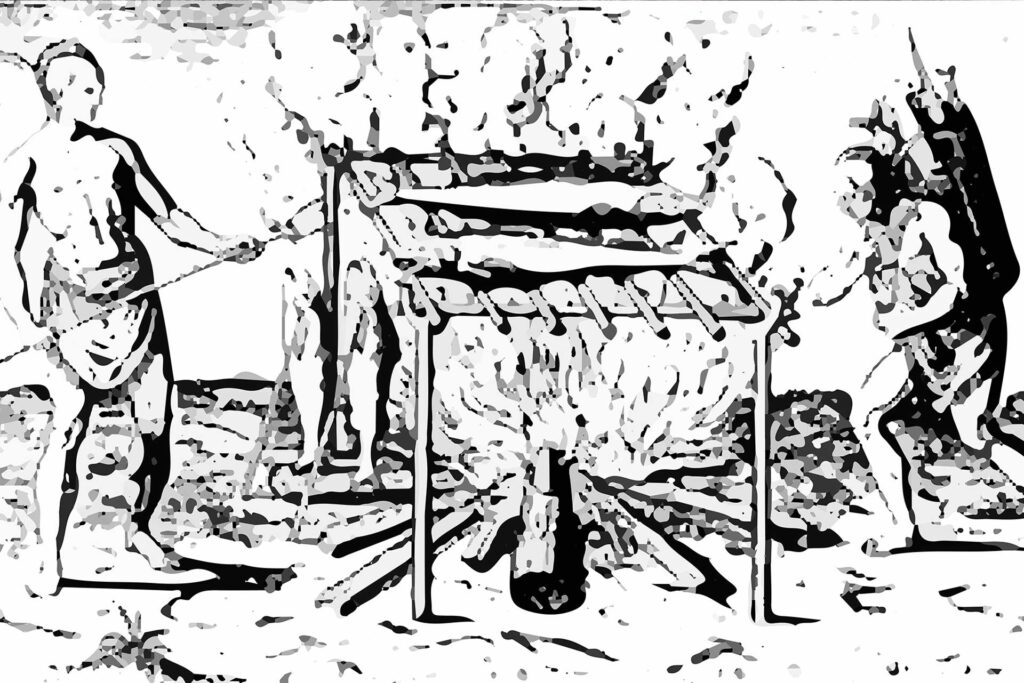
Smoking was done (and is still done today) by thinly slicing the fish or meat to be preserved and cutting away any fat. The slices were then hung over a fire pit on either a wooden grill or rope hanging over the fire until they were stiff, brittle and dry.
The objective was not to cook the meat or fish with flames, but dry them out with smoke, coating them in the process.
Smoking is done out in the open or in an enclosed structure and after 12 to 24 hours of drying the meat or fish is ready to eat. The process is also referred to as ‘jerking’ or creating ‘jerky’, much like the process of drying with a dehydrator or the sun.
Jerking is ideal because it condenses the meat’s nutrition and size making it easier to travel with and requires less storage space. Typically, 3 pounds of raw meat will yield 1 pound of jerky.
When prepared and preserved and properly dried smoked jerky can last three to five years at room temperature or 20 years if frozen.
#3. Canning (Also sometimes referred to as Bottling)
“Canning” is another food preservation method that has been around since way before we had refrigerators and freezers to make our food last longer.
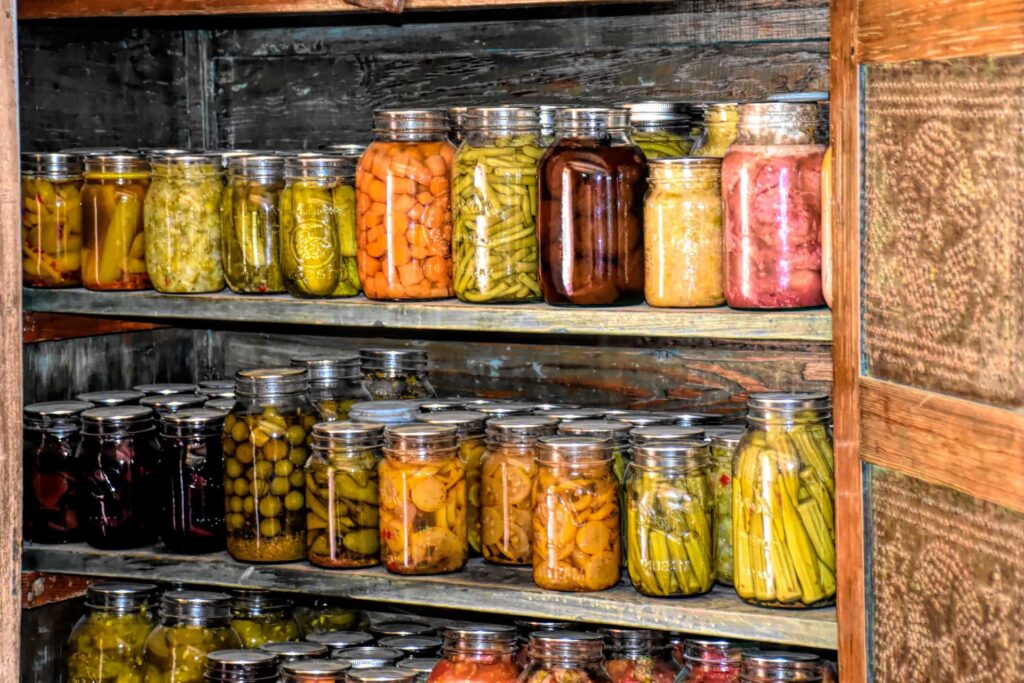
It was used by our ancestors as a safe method of preserving food for years in jars (‘cans’) in the pantry.
The process is very simple, and only seems to get complicated when the grubby fingers of state institutions get in the way to tell us everything we do is unsafe.
Back in the day, canning was simply the process of preserving food in jars that were then filled with water and a touch of salt or sugar before being brought to the boil to kill off any harmful bacteria. For a beginner's guide to learn how to can without a pressure cooker, you can read here.
We also wrote a comprehensive canning guide for long term storage with more details but to summarise, you need to sterilise some preserving jars before filling them up with your food. I use the Kilner preserving jars because I’m in the UK but Ball Mason Jars also do the trick.
As long as they have proper preserving lids you’ll be fine.
Once full (leaving about half an inch of headroom in the jar) put the lid on and place the jar into a pot of water, making sure to use a metal/wooden rack at the bottom of the pot so the jar doesn’t rest directly on the bottom of the pan.
Bring the jar(s) to a boil and let simmer for 30 minutes.
Remove the jar from the hot pan with your jar tongs and check the seal of the jar by gently pressing down on the centre. If the top ‘pops’, the jar hasn’t sealed properly but if there is no give in the lid and it doesn’t ‘pop’ or move, you have a vacuum seal and you can now leave your jars to cool to room temperature.
Once cooled, you can store in a cool, dark place and the contents will keep for at least 12 months.
If you didn’t get a good seal, you need to either store in the fridge and eat within two weeks or try boiling and sealing the jar again in your next batch.

#2. Pickling
Pickling is the process of adding a liquid solution of either brine or vinegar to a jar full of the fruit or vegetable you want to preserve. It’s very simple to do.
Pickling has been traced as far back as ancient Mesopotamia (Sumerians, Akkadians, Assyrians and Babylonians), although you have to wonder, how much of what we're told is true anyway?
Without refrigeration, pickling was an essential method of food preservation for these ancient cultures.
Then, as now, fruits and vegetables were pickled for long term storage, convenience, and taste. It was the only way to be able to enjoy vegetables and fruits all year round.
It works through fermentation.
What is fermentation?
Fermentation is the chemical breakdown of a substance by bacteria, yeast, or other tiny living things. These bacteria and yeast are created by immersing different foods in acidic liquid or brine (which is essentially salt and water) until they are no longer considered ‘raw’.
Cucumbers, asparagus, onions, carrots, cabbage, eggs, watermelon rinds, beets, garlic, kimchi and peppers are all great in pickles.
The brine (that salty solution) produces lactic acid and other antibacterial substances but leaves the good stuff behind like nutrients. It works because harmful bacteria can't tolerate high salt concentrations.
You can also use vinegar instead of brine and that works in a similar way but produces a different flavour. Vinegar lowers the pH of the mixture to a level where a lack of oxygen prevents the growth of harmful bacteria.
Both methods for pickling impact the texture and flavour as well as the look of your produce. It’s usually most noticeable as colour and size. For example, cucumbers are green off the vine but the brine or vinegar used in pickling turns the colour to olive.
In a salted brine solution, through the process of osmosis, the high concentration of salt in the solution causes a lot of the water to be drawn out of the cucumber and that makes it shrink.
Pickling is another one of those forgotten arts that your ancestors would scold you for forgetting. They never pickled for fun, it was born out of necessity to prevent food from spoiling so you owe it to your ancestors to relearn the skill!
And, as an added bonus; there’s an interesting myth about Queen Cleopatra and pickles, and how she credited her legendary beauty to pickling.
It’s probably not too far from the truth.
Read our comprehensive guide about how to pickle 100s of cucumbers for long term storage over here.
#1. Burying

Burying food is one of my favourite methods of food preservation. It's low tech, simple to construct and keeps food well preserved for months.
Our ancestors perfected this method over thousands of years in root cellars and clamps and other underground silos. The Romans used underground cave networks extensively for the storage of food. Despite it's ancient legacy, burying food is yet another casualty of our modern ways.
Burying food works because the ambient ground temperature beneath the frost line of any ground remains stable across seasons.
In the summer, the underground temperature will be cooler and, in the winter, the underground temperature will be warmer. The earth basically acts like a giant heat sink or refrigerator.
In a study carried out in 2015 by the British Geological Survey, the mean annual temperatures at 1m depth, reduced to sea level, ranges from 12.7°C in southern England to 8.8°C in northern Scotland, with corresponding seasonal ranges in temperature of 10.3°C and 7.9°C respectively.
In our guide about storing potatoes for the longterm, we discuss how the perfect temperature for storing potatoes is as close to 7.5°C as possible, which isn’t too far off the ambient underground temperature here in the UK.
And there’s a simple method you can use to reduce this a few degrees more by venting any trapped heat.
The basic principle with burying food for storage is that you need to bury your food in a watertight container deep enough in the ground so that the container and the food sit below the frostline and stabilise at the same temperature as the ground.
A galvanised steel bin is the perfect vessel for this.
Drill a few holes in the bottom so that any standing water drains quickly. Drill a hole big enough in the lid to insert a venting pipe to let the heat out of the bin. Remember, hot air rises and cool air sinks.
Obviously, you need to dig a hole big enough to drop the whole bin in, with just the lid resting at the level of the surface of the ground. You should do this in a dry and sheltered area.
Cover with an insulating material like straw or wool with just the venting pipe poking out.
Congratulations! You can now store your root veg and fruits like apples and pears in your mini root cellar!
I love this method because is it is very cost effective and you can dig as many holes as your garden or location allows!
Now that's technology I can dig!
If you enjoyed this guide or found it useful, please consider supporting the project to help others learn how to become more self sufficient and lead more meaningful lives of purpose.
If my content helps in any way and you'd like to say thanks, please consider buying me a coffee 🙏




Thanks for the informative post and keep up the Good Work ❤️
Thank you, Linda! I’m glad you found it helpful.
Superb. Thank you.
A useful summary. I wonder if jam has been left out because sugar will not be so plentiful?
Hi Tricia,
No, not at all…although that is a consideration.
It was only left out because I felt ‘jamming’ was a type of canning…but Jamming deserves a guide all on it’s own I dare say.
Do you jam your produce? If so and you’d like to write a guide to help others please feel free to drop me a message. I’d be happy to share it.
A couple of examples of guides written by other authors can be found here:
1. DIY Solar Freezer Setup
2. Regrowing Food From Supermarket Scraps
Hi Seb, I see you’ve added making jam – great idea because it’s perfect for beginners.
When I make jam, I tip my jam into clean jam jars and cover while its hot. Keeps 1 year at least.
The great advantage with jam, is that it doesn’t need a water bath canning if you are only keeping it for up to one year.
I can compile a paragraph of hot tips for beginners for you, and have included a link to my quickie jam page. Feel free to use the photo where u think best.